Signs of Water Damage Behind Walls: 7 Warning Signs
how-to · September 20, 2026 · Editorial Team
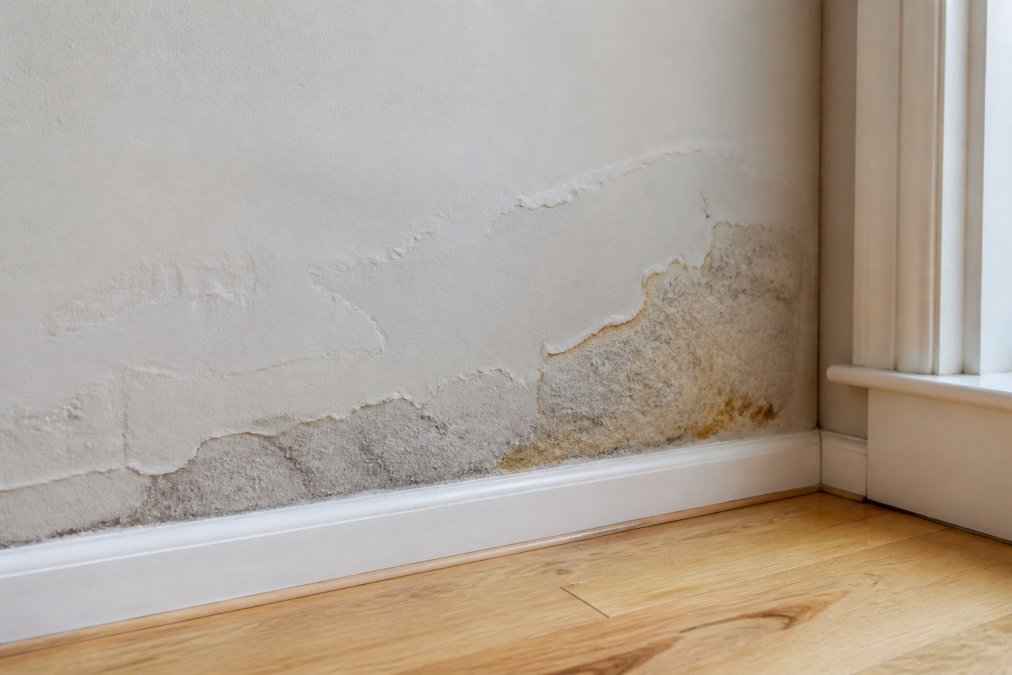
Table of Contents
- 7 Warning Signs of Water Damage Behind Walls
- Hidden Water Leak Detection Tools You Can Use
- How to Find a Water Leak in a Wall
- How to Waterproof a Bathroom Floor Properly
- Condensation vs. Leaks: How to Tell the Difference
- What to Do Immediately When You Spot Water Damage
- Frequently Asked Questions
Last Updated: September 23, 2026
7 Warning Signs of Water Damage Behind Walls
Water damage behind walls is a common problem many homeowners miss until it becomes expensive. This guide from SmithFamilyPaintingandProjects covers the warning signs, the tools that confirm a leak, and the steps to take right away.
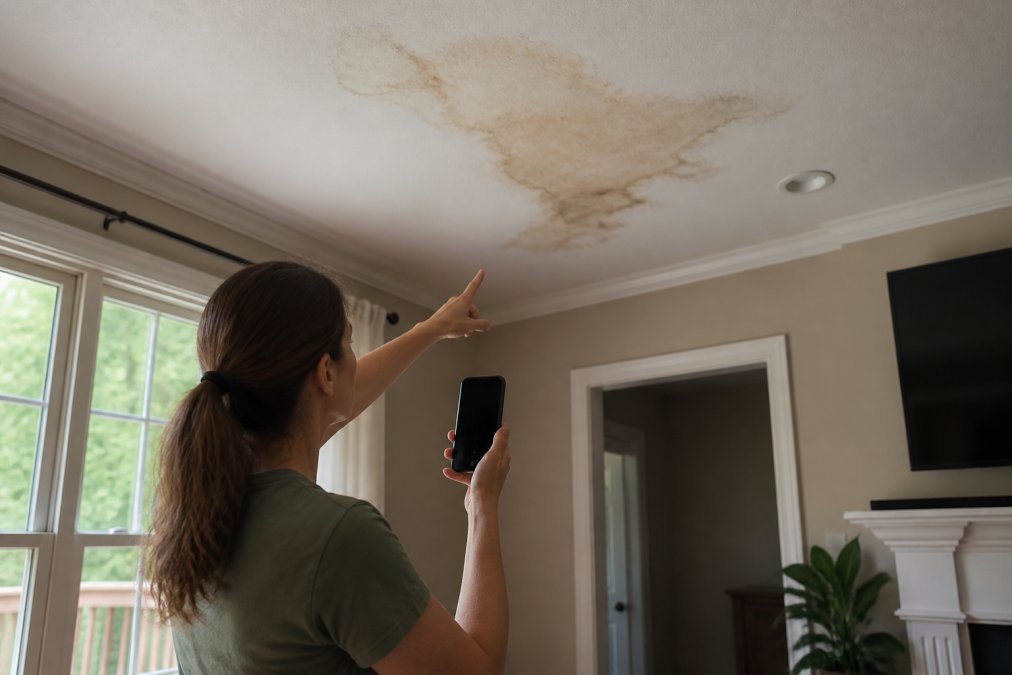 Homeowner pointing at a ceiling stain while documenting water damage behind walls with a smartphone
1. Water Stains and Discoloration
Water stains are the most visible clue. Look for yellow, brown, or copper-colored rings on ceilings and walls.
2. Musty Odors and Mold Growth
A musty odor is a strong sign of hidden moisture, coming from mildew and fungal growth feeding on damp drywall and wood.
3. Peeling Paint, Bubbling, and Wallpaper
Paint that bubbles, peels, or flakes points to moisture pushing from behind, breaking the bond between paint and surface.
4. Warping, Bulging, or Sagging Walls
When drywall soaks up water, it swells and loses shape, showing a bulge, soft spot, or sagging section.
5. Efflorescence on Masonry
Efflorescence is a white, chalky powder on brick, concrete, or stone, formed when water moves through masonry and leaves mineral salts behind as it dries.
6. Cracks in Drywall or Plaster
Not every crack means a leak. But cracks that appear suddenly, grow over time, or run in a stair-step pattern deserve attention.
7. Sticking Doors and Windows
Doors and windows that suddenly stick or won't latch can signal swelling. When wood framing absorbs water, it expands and throws the opening out of square.
Hidden Water Leak Detection Tools You Can Use
Most guides stop at "buy a moisture meter." The useful part is knowing how to run each tool, what the reading means, and where it lies to you. Here is how to use the five tools that confirm a hidden leak.
Pin-Type Moisture Meter
A pin-type meter drives two probes into the wall and measures electrical resistance between them. Wet material conducts better, so lower resistance equals higher moisture content.
- How to use it: Press the pins firmly into the drywall, not just the paint. Take three readings a few inches apart and note the highest.
- What the numbers mean: Readings are given as a percentage of moisture content by weight. Dry gypsum board typically reads in the low single digits. Anything at or above roughly 17% is a common industry threshold for "investigate now" because mold growth becomes likely above that level.
- Where it fails: Pins only read the material they touch. A dry outer layer of paint can mask a wet cavity behind it, and metal lath, foil backing, or a copper pipe behind the wall will skew the reading. Always confirm a high reading with a second method.
Thermal Imaging Camera
A thermal camera measures surface temperature, not water. Wet materials evaporate and cool the surface, and that temperature difference is what you see.
- How to use it: Scan the wall slowly, then compare the suspect area to a known-dry section of the same wall in the same lighting. You are looking for a cool, irregular patch, not a single cold pixel.
- Best conditions: Scan in the morning before the sun heats the exterior wall, or run the hot water and HVAC first so a supply or drain leak shows a temperature signature.
- Where it fails: A gap in insulation, a stud, or an exterior corner will also read cool. Thermal imaging tells you where to point a moisture meter, not what the problem is.
Infrared Thermometer
A cheap point-and-shoot alternative to a thermal camera, giving a single temperature per trigger pull.
- How to use it: Build a grid. Take a reading every 12 inches across the suspect wall and write them down. A spot that runs 3 to 5 degrees cooler than its neighbors is worth probing with a meter.
- Trade-off: You get a number, not a picture, so you can miss a small wet patch between your sample points.
Flashlight and Awl
Low-tech but the fastest way to find a bulge or soft spot.
- How to use it: Hold the flashlight flat against the wall and shine it sideways across the surface. Raking light exaggerates any bulge, seam lift, or paint blister.
- Probing: Press the tip of an awl or a screwdriver handle into the suspect spot with light pressure. Drywall that crushes or feels spongy is saturated. Stop before you punch through, you want a diagnosis, not a hole.
Plastic Sheet Test (for Condensation vs. Leak)
This test separates surface condensation from moisture coming through the wall.
- How to use it: Tape a 12-by-12-inch square of clear plastic tight against the wall and seal all four edges with tape. Leave it 24 hours.
- Reading it: Droplets on the room-facing side of the plastic mean humid indoor air is condensing on a cool wall, a ventilation problem. Dampness or darkening on the wall side of the plastic means moisture is moving out of the wall, a leak.
How to Find a Water Leak in a Wall
Finding a leak takes a step-by-step approach. Work from the most likely source outward.
- Shut off the water supply to stop the flow while you search.
- Check the meter. If the dial still spins with all fixtures off, you have a supply line leak.
- Scan with a moisture meter along baseboards, ceilings, and around fixtures.
- Use thermal imaging to trace the cool path back to its source.
- Inspect common culprits: supply lines, drain pipes, roof penetrations, and window flashing.
- Confirm with the plastic test to rule out condensation.
How to Waterproof a Bathroom Floor Properly
Bathrooms are a top source of hidden leaks, and proper waterproofing keeps water out of the floor and wall cavity.
- Remove the old flooring down to the subfloor.
- Repair any soft or rotted wood before you cover it.
- Install a cement backer board over the subfloor.
- Apply a waterproof membrane across the whole floor and up the walls a few inches.
- Seal every seam and corner with membrane tape and sealant.
- Set the tile and grout once the membrane cures.
- Caulk the edges where the floor meets the wall and fixtures.
Condensation vs. Leaks: How to Tell the Difference
Condensation and leaks look similar but need different fixes. Getting this wrong wastes time and money.
What to Do Immediately When You Spot Water Damage
The first hour decides how much of your wall you keep. Mold can begin colonizing wet drywall and wood framing within 24 to 48 hours, so the goal in the first 60 minutes is to stop the water, make the area safe, and start drying, in that order.
Minutes 0-10: Stop the Source and Make It Safe
- Shut off the water at the main valve if you see active dripping or a spreading wet spot. Every minute of flow adds to the saturated area.
- Kill power to the affected rooms at the breaker if water is near outlets, switches, or a ceiling light fixture. Water and live wiring turn a repair into an emergency; if you cannot reach the breaker safely, leave and call for help.
- Do not step into a sagging ceiling. A bulging ceiling can hold gallons of water and can collapse without warning. Clear the room and stay out from under it.
Minutes 10-30: Document and Contain
- Photograph and video everything before you move a thing. Shoot wide shots of the room, close-ups of the stain or bulge, and any damaged belongings. Insurers want the condition at discovery, not after cleanup.
- Check your policy and call your insurer's claims line. Most policies cover sudden and accidental discharge from a supply line or appliance but exclude long-term seepage. The discovery date matters, so report it the same day.
- Move furniture, rugs, and electronics clear of the wet zone. Wet carpet padding and upholstery wick water and hold it against the floor, extending the damage.
Minutes 30-60: Start Drying
- Soak up standing water with towels, a wet/dry shop vacuum, or a mop, the less free water, the faster the structure dries.
- Set up airflow and dehumidification. Aim box fans across the wet surface, not into the wall, and run a dehumidifier in the closed room. Moving air plus lowered humidity pulls moisture out of drywall and framing.
- Open interior and closet doors so humid air reaches the dehumidifier instead of trapping moisture in a closed cavity.
What Not to Do in the First Hour
- Do not run a household box fan aimed directly into an opened wall cavity. It can spread mold spores through the room, contain the area first.
- Do not use a shop vacuum on standing water near live outlets until power is off at the breaker.
- Do not tear out drywall to "see how bad it is" before confirming the source with a moisture meter, you can turn a small repair into a full wall replacement.
When to Stop DIY and Call a Pro
Call a licensed water-damage or restoration professional the same day if any of these are true:
- The wet area exceeds roughly 10 square feet, or moisture has reached the wall cavity, insulation, or subfloor.
- You smell a musty odor or see visible mold, colonization has already started.
- The source is a slab leak, sewer line, or contaminated water (Category 2 or 3), which requires protective equipment and disposal.
- The ceiling sags, the wall bulges, or the framing feels soft.
Frequently Asked Questions
How do you know if your water is leaking behind the wall?
Look for water stains, musty odors, peeling paint, or warped walls. Check for a spike in your water bill or run a meter test: turn off all fixtures, note the meter reading, wait two hours, and check again. If the dial moves, you likely have a hidden leak. A moisture meter or thermal imaging camera can confirm dampness inside the wall cavity without cutting into drywall.
Does insurance cover water damage in walls?
Most homeowners insurance covers sudden, accidental water damage from burst pipes or appliance failures. It typically does not cover gradual seepage, poor maintenance, or flood damage. Document everything with photos and call your insurer promptly. Coverage depends on your specific policy, so review your documents carefully.
How long does it take to dry out walls from water damage?
Drying typically takes three to five days with professional air movers and dehumidifiers. Thick materials like plaster or saturated drywall may need a week or more. If humidity stays high or the source is not fully stopped, drying stalls and mold can begin within 24 to 48 hours. Monitor with a moisture meter and do not paint or patch until readings return to normal.
Can mold grow behind walls without visible signs?
Yes. Mold often grows inside the wall cavity where you cannot see it, feeding on drywall paper and wood framing. The first clue is usually a musty odor or allergy symptoms that worsen in one room. A moisture meter reading above 20% signals a problem. If you suspect hidden mold, a professional inspection can confirm it and recommend safe remediation before you renovate.
Water damage behind walls only gets worse with time. The signs are easy to ignore until a small leak turns into a major repair.
SmithFamilyPaintingandProjects brings skilled workmanship, expert attention to detail, and full project support to every job. If you've spotted stains, smells, or soft spots, get help before the damage spreads. Call 434-944-4649 and let our family-owned team protect your home.
Frequently asked questions
How do you know if your water is leaking behind the wall?
Look for water stains, musty odors, peeling paint, or warped walls. Check for a spike in your water bill or run a meter test: turn off all fixtures, note the meter reading, wait two hours, and check again. If the dial moves, you likely have a hidden leak. A moisture meter or thermal imaging camera can confirm dampness inside the wall cavity without cutting into drywall.
Does insurance cover water damage in walls?
Most homeowners insurance covers sudden, accidental water damage from burst pipes or appliance failures. It typically does not cover gradual seepage, poor maintenance, or flood damage. Document everything with photos and call your insurer promptly. Coverage depends on your specific policy, so review your documents carefully.
How long does it take to dry out walls from water damage?
Drying typically takes three to five days with professional air movers and dehumidifiers. Thick materials like plaster or saturated drywall may need a week or more. If humidity stays high or the source is not fully stopped, drying stalls and mold can begin within 24 to 48 hours. Monitor with a moisture meter and do not paint or patch until readings return to normal.
Can mold grow behind walls without visible signs?
Yes. Mold often grows inside the wall cavity where you cannot see it, feeding on drywall paper and wood framing. The first clue is usually a musty odor or allergy symptoms that worsen in one room. A moisture meter reading above 20% signals a problem. If you suspect hidden mold, a professional inspection can confirm it and recommend safe remediation before you renovate.