How to Waterproof a Bathroom Floor Properly
how-to · October 11, 2026 · Editorial Team
Table of Contents
- Assessing Whether Your Bathroom Floor Needs Waterproofing
- What to Use to Seal a Bathroom Floor: Choosing the Right Waterproofing Membrane
- Preparing Your Bathroom Subfloor for Waterproofing
- Step-by-Step Installation of Bathroom Floor Waterproofing
- Bathroom Waterproofing Drying Time and Curing
- Common Bathroom Floor Waterproofing Mistakes to Avoid
- Testing and Verifying Your Waterproofing Before Finishing
- When to Call a Professional Contractor
- Frequently Asked Questions
Last Updated: October 11, 2026
Assessing Whether Your Bathroom Floor Needs Waterproofing
Your bathroom floor faces constant moisture exposure. Water from showers, sinks, and cleaning seeps into the substrate if it's not properly protected. Water damage escalates quickly, starting as soft spots in subfloors and ending as structural rot that costs thousands to repair.
Most homeowners discover the need too late, when mold appears or the floor feels spongy underfoot.
Signs your bathroom floor needs waterproofing:
- Soft or squishy spots in the subfloor
- Visible water stains on ceilings below the bathroom
- Musty odors coming from under the tile
- Grout lines that are cracked or deteriorating
- Discoloration spreading across grout or tile
- The floor slopes toward one corner instead of toward a drain
If your bathroom is brand new or you're planning a remodel, waterproofing should happen before tile installation. If you notice any of these warning signs, waterproofing becomes urgent, delaying it allows moisture to penetrate deeper into the substrate, making repairs exponentially more expensive.
What to Use to Seal a Bathroom Floor: Choosing the Right Waterproofing Membrane
A waterproofing membrane prevents water from reaching the substrate beneath your tile. Two main types exist: liquid membranes and sheet membranes. Wrong selection leads to incomplete coverage, adhesion failures, and water infiltration at critical junctions.
Liquid Waterproofing Membranes
Liquid membranes are applied with a roller or brush, similar to paint. They conform perfectly to irregular surfaces, corners, and penetrations like toilet flanges and drain pipes. This makes them ideal for complex bathroom layouts with multiple fixtures.
Liquid membranes cure to form a seamless, flexible barrier and handle substrate movement well. The trade-off is curing time, most require 24-48 hours between coats, and they're messier to apply, requiring careful technique to avoid thin spots.
Sheet Membranes
Sheet membranes are pre-fabricated rolls you unroll and overlap by 4-6 inches, then seal with adhesive or heat. They're faster on large, flat areas and provide uniform thickness automatically. The challenge is sealing seams and managing penetrations like toilet flanges and drains, errors here become water entry points. Sheet membranes also don't flex as much as liquid ones, so they can crack if the substrate shifts.
Preparing Your Bathroom Subfloor for Waterproofing
Waterproofing fails when applied over dirt, dust, old adhesive, or damaged substrate. Preparation determines whether your membrane bonds properly and lasts decades or peels away within years.
Substrate Assessment and Material Identification
Identify your subfloor material first: concrete (common in ground-level bathrooms), cement board (standard for above-grade bathrooms), or plywood (which must be replaced with cement board before waterproofing).
Inspect for soft spots, discoloration, visible cracks, or failed waterproofing, these indicate where water has already penetrated and require additional attention.
Concrete Subfloor Preparation
Use a floor scraper or grinding machine to remove all old flooring, tile, adhesive, grout, and sealers down to bare concrete. Adhesive residue is the most common culprit for membrane failure.
Concrete often develops a white, chalky surface called efflorescence, mineral salts that prevent waterproofing adhesion. Use a wire brush or light grinding to remove it.
Test concrete moisture using a calcium chloride test kit or moisture meter. Most manufacturers require moisture below 3 pounds per 1,000 square feet per 24 hours. If higher, allow additional drying time or use a dehumidifier.
Hairline cracks (under 1/16 inch) can be sealed with liquid membrane alone. Cracks 1/16 to 1/4 inch wide should be filled with epoxy filler or self-leveling polyurethane sealant.
Cement Board Subfloor Preparation
Cement board is designed to accept waterproofing and requires less aggressive treatment than concrete, but still demands careful cleaning.
Remove all old flooring, tile, and adhesive with a floor scraper, avoiding gouges that weaken the substrate. Vacuum thoroughly, then wipe with a damp cloth and allow to dry completely (at least 24 hours).
Check for soft spots by pressing firmly on the surface. If any area feels spongy, that section must be replaced. Install new cement board with corrosion-resistant fasteners spaced 8 inches apart.
Apply waterproof caulk or sealant over every fastener head to prevent water from traveling along the fastener shaft into the substrate.
Plywood Subfloor Replacement
If your bathroom has a plywood subfloor, strip it down to the floor joists and inspect for rot. Install cement board over the joists with corrosion-resistant fasteners spaced 8 inches apart. Tape all seams with waterproof mesh tape and thin-set mortar, then allow to cure before waterproofing.
Final Inspection Before Waterproofing
After preparation is complete, perform a final walkthrough:
- The substrate is clean, dry, and free of dust, debris, and loose material.
- All cracks have been filled and repairs have fully cured.
- Fastener heads are sealed.
- The surface is smooth with no gouges, voids, or high spots that would prevent even membrane coverage.
- Moisture content meets manufacturer specifications (typically below 3 pounds per 1,000 square feet per 24 hours for concrete).
- Temperature is between 50°F and 85°F, and humidity is below 80%, conditions required for proper membrane curing.
Do not proceed with waterproofing until all preparation is complete and verified. Shortcuts here directly cause membrane failures within months.
Step-by-Step Installation of Bathroom Floor Waterproofing
Proper installation determines whether your waterproofing protects your bathroom for years to come or fails prematurely. Follow these steps precisely.
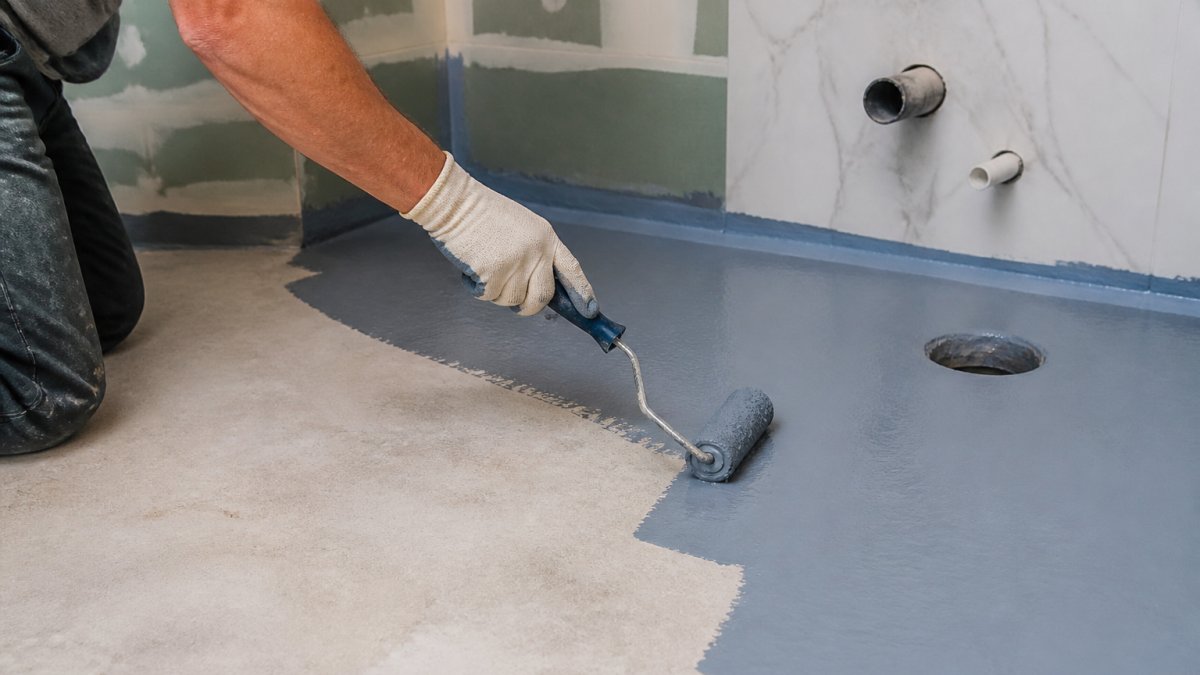 Diagram showing how to waterproof a bathroom floor properly by applying liquid membrane with a roller
Priming and First Coat Application
Apply primer if required, then roll the first coat of liquid membrane in one direction, working in 3-foot sections. Apply enough pressure for good substrate contact without oversaturating. Pay special attention to corners, floor-to-wall junctions, and toilet flanges with extra passes.
Sealing Critical Junctions and Penetrations
Apply reinforcing tape at floor-to-wall junctions before the first coat dries. Around toilet flanges and drains, apply extra membrane coats extending 6-8 inches in all directions. For sheet membranes, overlap the membrane around penetrations by at least 3 inches and seal with adhesive or heat. Caulk all seams between sections with waterproof caulk.
Applying Additional Coats
Most systems require 2-3 coats. Apply the second coat perpendicular to the first to catch thin areas. Allow full curing between coats. For liquid membranes, a third coat is often recommended in high-moisture areas like shower floors.
Bathroom Waterproofing Drying Time and Curing
Drying time and curing are not the same. Most liquid membranes are touch-dry within 2-4 hours but require 24-48 hours of full curing before tile installation. Sheet membranes cure faster, typically 12-24 hours. Cold, damp conditions slow curing, add 50% more time if below 50°F or humidity exceeds 80%. Don't install tile until fully cured.
Common Bathroom Floor Waterproofing Mistakes to Avoid
Waterproofing failures usually stem from a few recurring mistakes that are entirely preventable.
Common mistakes include: skipping surface preparation (dirt and old adhesive prevent adhesion); applying membrane too thin (follow manufacturer specifications); ignoring corners and penetrations (water finds these weak points first); installing tile before full curing (traps uncured membrane); using the wrong membrane type (check compatibility); and failing to seal seams properly on sheet membranes (overlap by at least 4-6 inches).
Testing and Verifying Your Waterproofing Before Finishing
Before installing tile, verify that your waterproofing actually works. Testing catches failures before they become expensive problems hidden behind tile and grout. There are two verification methods: visual inspection and flood testing. Both should be performed before tile installation.
Visual Inspection and Membrane Verification
Perform a thorough visual inspection: the membrane should be uniform in color with no thin spots or bare patches; seams should be fully sealed with no gaps or lifted areas; corners and penetrations should have the membrane extending at least 6 inches up walls and completely surrounding all penetrations; and caulked seams should be continuous and flexible. Repair any thin, cracked, or missing areas before testing.
Flood Testing Procedure
A flood test simulates worst-case water exposure and reveals failures before they cause damage.
Tape the doorway threshold to contain water, then fill the floor to 2-3 inches depth. Allow water to sit for 24 hours, then inspect the space below for water stains, dripping, or moisture. If no water appears below and the floor remains dry, your waterproofing has passed. If water appears, the waterproofing has failed and must be repaired.
Troubleshooting Failed Waterproofing
If your flood test reveals water penetration, drain the bathroom and allow everything to dry thoroughly. Inspect for visible cracks, thin spots, or areas where the membrane has separated. Common failure points include floor-to-wall junctions, toilet flanges, drain openings, unsealed seams on sheet membranes, and thin spots in liquid membranes.
For thin spots in liquid membranes, apply 2-3 additional coats extending 12 inches beyond the visible problem. For unsealed seams on sheet membranes, reapply sealant and press firmly. For penetration failures, apply additional coats extending 8 inches in all directions. If the flood test reveals multiple leak points or widespread failure, remove the failed membrane and install a new system.
When Surface Sealing Alone Will Not Fix a Failed Membrane
Sealing visible grout lines or applying topical sealers does not address underlying waterproofing failure. If water damage occurs after tile installation, the tile and grout must be removed to access and inspect the underlying membrane. If failed or missing, it must be replaced before tile is reinstalled. This is more expensive than getting waterproofing right the first time.
Documentation and Next Steps
If your flood test passes, document the result with photos showing the water level and the dry conditions below the bathroom. Keep these photos with your home maintenance records. This documentation proves the waterproofing was tested and verified before tile installation, which is important for warranty claims and future repairs.
Once testing is complete and passed, you are ready to proceed with tile installation. The waterproofing is now protected by tile and grout, and your bathroom floor is safeguarded against water damage for years to come if maintenance is performed properly.
When to Call a Professional Contractor
Learning how to waterproof a bathroom floor properly is one home project where professional expertise pays dividends. Small mistakes become expensive water damage claims.
Call a professional if your bathroom has complex geometry, multiple penetrations, or existing water damage. If the subfloor shows rot or structural issues, professional assessment is essential.
At SmithFamilyPaintingandProjects, we handle bathroom waterproofing as part of comprehensive remodeling projects. Our team ensures proper substrate preparation, correct membrane selection, and thorough testing before tile installation.
Bathroom waterproofing is foundational work that protects your home for decades. Skipping it or doing it poorly leads to water damage that spreads silently until structural repairs become necessary.
Frequently Asked Questions
Do bathroom floors really need to be waterproof?
Yes. Bathrooms expose floors to constant moisture from showers, tubs, and sinks. Without proper waterproofing, water penetrates the subfloor and can cause mold, rot, structural damage, and costly repairs. Building codes require waterproofing in wet areas. Waterproofing a bathroom floor properly protects your home's foundation and prevents emergency water damage that could cost thousands to fix.
What's the difference between liquid and sheet waterproofing membranes?
Liquid membranes are applied like paint with a roller or brush, creating a seamless barrier that conforms to irregular surfaces and penetrations. Sheet membranes are pre-made rolls of rubber or plastic that are adhered to the substrate and require careful sealing at seams and edges. Liquid membranes work better for complex geometries and small spaces; sheet membranes cover large flat areas faster but need more precision at joints.
How long does bathroom waterproofing take to dry and cure?
Drying time varies by product: most liquid membranes dry to the touch in 2-4 hours but require 24-48 hours before a second coat. Full curing typically takes 5-7 days before tile installation. Sheet membranes cure faster, sometimes within 24 hours. Always check your specific product's technical data sheet and follow the manufacturer's timeline, rushing this step compromises waterproofing performance and can trap moisture under tiles.
What's the most common bathroom floor waterproofing mistake?
Skipping proper substrate preparation is the leading cause of waterproofing failure. If you don't clean, dry, and repair the floor before applying membrane, adhesion suffers and water finds its way underneath. Other critical mistakes include not sealing floor-to-wall junctions, toilet flanges, and tub edges thoroughly, and applying membrane too thin. Rushing curing time and tiling before full cure is complete also undermines the entire system.
Frequently asked questions
Do bathroom floors really need to be waterproof?
Yes. Bathrooms expose floors to constant moisture from showers, tubs, and sinks. Without proper waterproofing, water penetrates the subfloor and can cause mold, rot, structural damage, and costly repairs. Building codes require waterproofing in wet areas. Waterproofing a bathroom floor properly protects your home's foundation and prevents emergency water damage that could cost thousands to fix.
What's the difference between liquid and sheet waterproofing membranes?
Liquid membranes are applied like paint with a roller or brush, creating a seamless barrier that conforms to irregular surfaces and penetrations. Sheet membranes are pre-made rolls of rubber or plastic that are adhered to the substrate and require careful sealing at seams and edges. Liquid membranes work better for complex geometries and small spaces; sheet membranes cover large flat areas faster but need more precision at joints.
How long does bathroom waterproofing take to dry and cure?
Drying time varies by product: most liquid membranes dry to the touch in 2-4 hours but require 24-48 hours before a second coat. Full curing typically takes 5-7 days before tile installation. Sheet membranes cure faster, sometimes within 24 hours. Always check your specific product's technical data sheet and follow the manufacturer's timeline—rushing this step compromises waterproofing performance and can trap moisture under tiles.
What's the most common bathroom floor waterproofing mistake?
Skipping proper substrate preparation is the leading cause of waterproofing failure. If you don't clean, dry, and repair the floor before applying membrane, adhesion suffers and water finds its way underneath. Other critical mistakes include not sealing floor-to-wall junctions, toilet flanges, and tub edges thoroughly, and applying membrane too thin. Rushing curing time and tiling before full cure is complete also undermines the entire system.