How to Paint Interior Doors: 8 Steps for a Smooth Finish
how-to · October 31, 2026 · Editorial Team
Quick Summary
To paint interior doors properly, remove the door and hardware, degrease and sand it, fill holes, prime with the right primer, then apply thin coats of water-based satin or semi-gloss enamel with a brush and foam roller. Work from the panels outward and allow proper drying between coats.
- Skipping the degreasing step is the most common reason paint peels off a door within a year.
- Sand with 120-grit to remove old gloss, then finish with 220-grit for a smooth surface.
- Use a bonding primer on glossy or factory-finished doors; the tape test reveals whether you need one.
- Water-based acrylic enamel in satin or semi-gloss is the best choice for most homes.
- Keep room temperature between 65°F and 80°F and wait for full cure before slamming the door.
Table of Contents
- What You'll Need to Paint Interior Doors Properly
- Best Paint for Interior Doors: Choosing by Material and Finish
- Preparing the Door: Removing Hardware, Cleaning, and Filling Holes
- How to Sand and Prime a Door Before Painting
- Paint Interior Doors with a Brush or Roller: Order and Technique
- How Long to Wait Between Coats of Door Paint
- Troubleshooting Brush Marks, Drips, and Peeling Finish
- Booking a Professional Door Painting Job in Southside Virginia
- Frequently Asked Questions
What You'll Need to Paint Interior Doors Properly
Painting an interior door looks simple, but the right tools make the job faster and the finish smoother. Most of what you need is easy to find at a local hardware store.
- Screwdriver or drill for removing hinges and hardware
- Degreaser or a mild dish soap solution for cleaning
- Sandpaper in 120-grit and 220-grit
- Wood filler or spackle for holes and cracks
- Primer suited to your door material
- Good-quality angled brush (2 to 2.5 inches)
- Foam roller with a fine nap for flat panels
- Painter's tape and drop cloths
- Tack cloth or lint-free rag
- Paint for doors, usually a satin or semi-gloss finish
Watch out: Skipping the degreasing step is the most common reason paint peels off a door within a year. Kitchen doors and doors with fingerprints need the most cleaning.
Best Paint for Interior Doors: Choosing by Material and Finish
The right paint depends on what the door is made of and what finish it already has. A solid wood door and a hollow-core door need different preparation, and both need a paint built for trim and doors.
| Door material or existing finish | Primer to use | Topcoat recommendation | Watch out for |
|---|---|---|---|
| Bare solid wood | Oil-based or shellac-based stain-blocking primer on knots; water-based wood primer elsewhere | Water-based acrylic enamel, satin or semi-gloss | Knot bleed-through; sand with the grain |
| MDF or engineered wood | Water-based primer labeled for MDF | Water-based acrylic enamel, satin | Edges drink paint, seal them first |
| Hollow-core (hardboard skin) | Water-based bonding primer | Flexible water-based enamel | Cracking at edges if paint is too thick |
| Metal (steel or aluminum) | Rust-inhibitive metal primer | Direct-to-metal acrylic enamel | Skip the primer and the paint flakes |
| Previously painted, sound | Bonding primer only if glossy or slick | Same sheen as before, or one step flatter | Test a patch before committing |
| Factory-finished or glossy | Bonding primer after dulling the surface | Water-based acrylic enamel | Paint will not grip without sanding |
Sheen trade-offs. Semi-gloss is the traditional door finish because it wipes clean and resists scuffs, but it also telegraphs every ding, brush mark, and filled hole. Satin hides small imperfections and is the better choice for older doors, hollow-core doors, and any door in a high-traffic hallway.
Water-based versus oil-based. For most homes, a water-based acrylic enamel in satin or semi-gloss is the best choice. It resists scuffs, cleans easily, and dries hard enough to handle daily use.
Preparing the Door: Removing Hardware, Cleaning, and Filling Holes
Good prep is what separates a smooth finish from a rough one. Take the time to do it right before opening a can of paint.
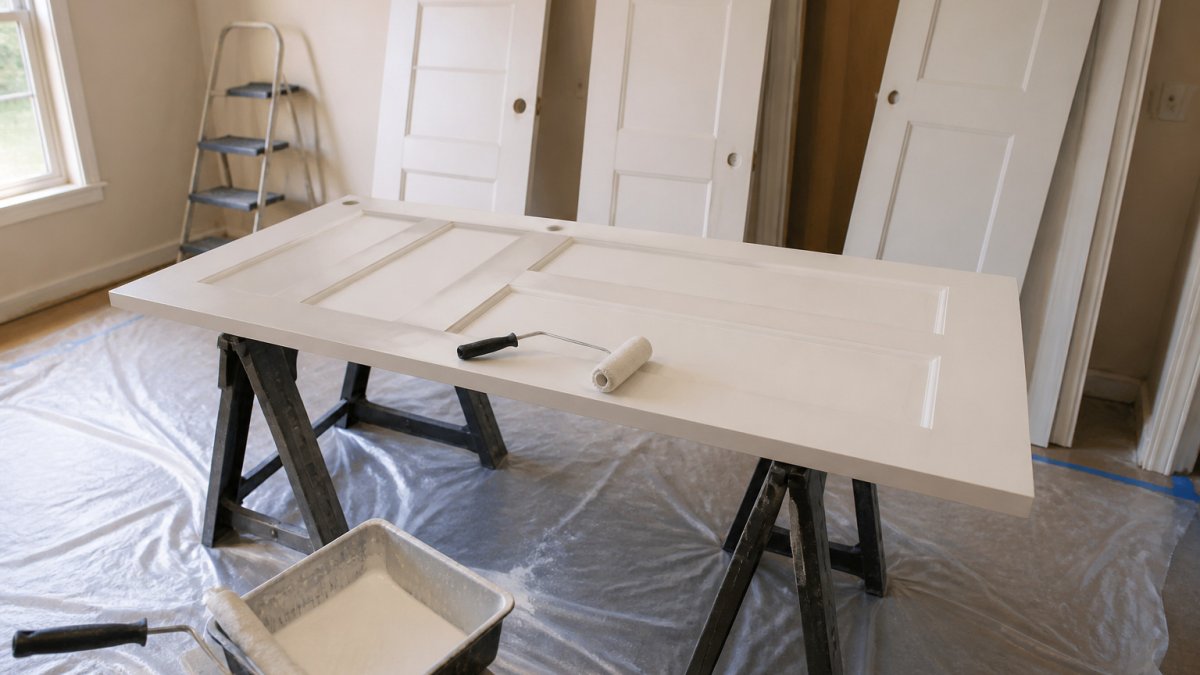
Remove the door from its hinges and lay it flat on sawhorses or a table. This makes it easier to paint all sides evenly and avoids drips running down the surface. If the frame or door needs more than cosmetic prep, home repair and remodeling services in Danville and Chatham, VA are also available. Take off the knob, latch plate, and hinges, and store the screws in a labeled bag.
Clean the surface with a degreaser or a mild dish soap solution. Wipe away fingerprints, dust, and grease, especially near the handle. Rinse with clean water and let it dry completely.
Fill any holes, cracks, or dents with wood filler or spackle. Press it in with a putty knife, let it dry, and sand it smooth. Filling the holes now saves you from patching a painted surface later.
How to Sand and Prime a Door Before Painting
Sanding gives the primer and paint something to grip. Start with 120-grit sandpaper to remove old gloss and rough spots, then finish with 220-grit for a smooth surface.
Sand with the grain on wood doors and keep pressure light on flat panels so you do not wear through the edges. Wipe the dust away with a tack cloth or a damp rag, then let the door dry.
Primer seals the surface and helps the topcoat bond. Use a bonding primer on glossy or factory-finished doors. Apply a thin, even coat to the panels, rails, and stiles, then let it dry for the time listed on the can, usually 2 to 4 hours.
Watch out: Painting over bare filler without priming often leaves dull patches that show through the topcoat.
Paint Interior Doors with a Brush or Roller: Order and Technique
Painting in the right order keeps wet edges from smudging. Work from the top down and from the inside of the door out.
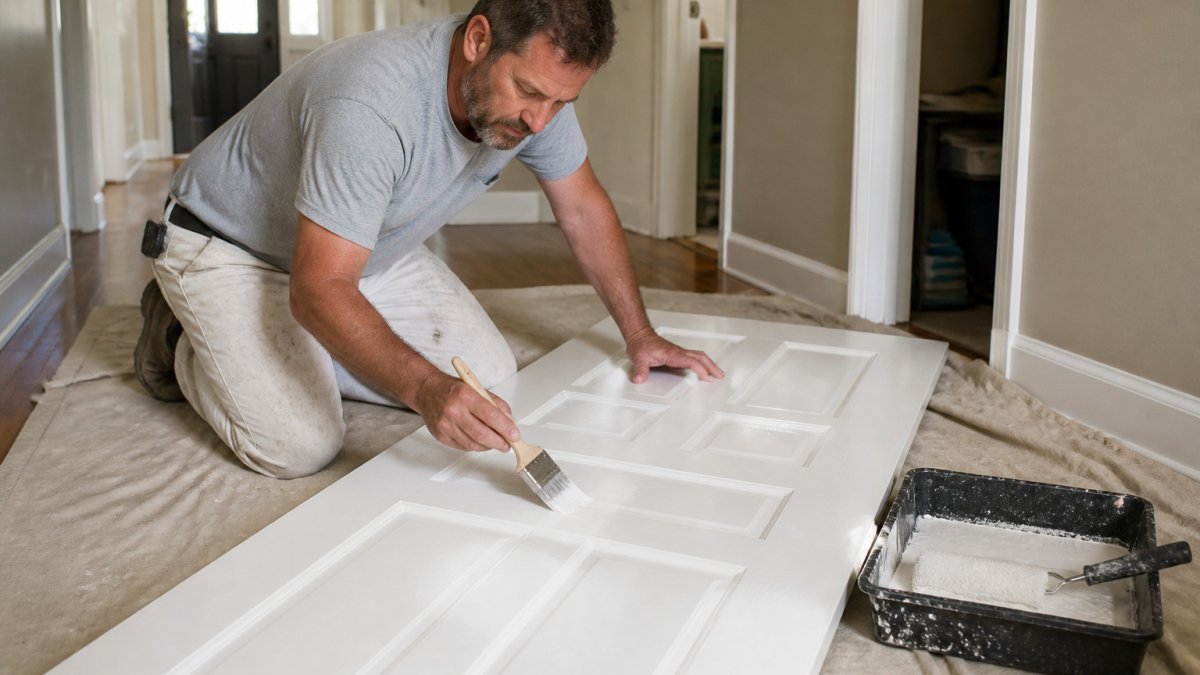 Homeowner using a brush to paint interior doors while working on a flat-laid panel in a bright hallway.
- Paint the recessed panels first with an angled brush, following the grain.
- Paint the vertical stiles and horizontal rails next.
- Brush the edges of the door last, keeping the paint thin.
- Roll the flat surfaces with a foam roller to smooth out brush marks.
Use light, even strokes and avoid overloading the brush. Keep a wet edge by working quickly across each section. Once the paint is on, do not go back over areas that have started to set.
Hang the door when the paint is dry to the touch. Reinstall the hardware and hinges, then check that the door swings freely.
How Long to Wait Between Coats of Door Paint
Drying times on a label assume ideal conditions, which are often not met in a home. Real rooms rarely hit that, so treat the can as a starting point and the door itself as the final authority.
Dry to touch (usually 30 to 60 minutes). The surface no longer feels wet and paint does not transfer to a light finger touch. This is not a recoat signal. Recoating at this stage traps solvent under the new coat and produces wrinkling, poor adhesion, or a finish that stays soft for weeks.
Dry to recoat (usually 2 to 4 hours for water-based, 8 to 24 hours for oil-based). The first coat has released most of its solvent and can accept a second coat. Check the label, then check the door: press a thumbnail into an inconspicuous spot. If it leaves a dent, wait longer. Lightly sand with 220-grit to knock down nibs and improve mechanical grip between coats, then wipe the dust with a tack cloth.
Full cure (often 2 to 3 weeks for water-based enamel, longer for oil). Cure is a chemical process, not just evaporation. The film continues to harden for days or weeks after it feels dry. During that window, avoid slamming the door, cleaning it with harsh products, or hanging heavy items on it. Full cure is also when the finish reaches its final hardness and scrub resistance.
How conditions shift the clock.
- Temperature: Below about 50°F, most water-based paints stop coalescing properly and the film stays soft or chalky. Above about 90°F, the surface skins over before solvent escapes, which causes wrinkling. Aim for 65°F to 80°F.
- Humidity: Above roughly 70% relative humidity, water evaporates slowly and recoat times can double. Run a dehumidifier or wait for a drier day.
- Ventilation: Moving air speeds solvent release and reduces odor. A box fan on low, pointed away from the wet door, is usually enough. Do not aim it directly at the surface, that can skin the paint over.
- Film thickness: A thick coat dries from the outside in. Two thin coats cure faster and harder than one heavy coat, even though the heavy coat looks done sooner.
A second coat usually gives a more even color and a stronger finish. Wait until the first coat is dry to the touch, then lightly sand with 220-grit paper before applying the next coat.
The door should cure fully before it takes hard knocks or heavy wear. Full cure can take several weeks, so avoid slamming the door or cleaning it aggressively during that time.
Troubleshooting Brush Marks, Drips, and Peeling Finish
Most finish problems come from thick paint, rushed prep, or painting in cold or humid conditions.
- Brush marks: Use a higher-quality brush, thin the paint slightly, and brush with the grain.
- Drips and runs: Apply thinner coats and remove excess paint from the brush before starting.
- Peeling: The surface was probably not cleaned or sanded enough. Strip the loose paint and repeat the prep.
- Sticking doors: Paint that is too thick on the edges can make the door stick. Sand the edges lightly and repaint with a thin coat.
Paint in a well-ventilated room with a steady temperature. Open a window and run a fan to keep the air moving while the paint dries, and keep children and pets out of the space until the fumes fade.
Booking a Professional Door Painting Job in Southside Virginia
Some homeowners prefer to hand the job off, especially for doors that need major repairs or for a large number of doors. A local painting company can handle the prep, finish, and cleanup while you focus on other projects.
If you would rather hand the job off, SmithFamilyPaintingandProjects can help. Call 434-944-4649 to discuss your project. You can also find interior painting services in Danville and Chatham, VA on their website.
If your door needs more than cosmetic prep, such as repairing damaged wood or drywall around the frame, a licensed contractor can address the problem before the paint goes on. Call SmithFamilyPaintingandProjects at 434-944-4649 to talk through your project.
Frequently Asked Questions
What is the best way to paint a door?
The most reliable method is to remove the door from its hinges and lay it flat on sawhorses or a drop cloth. Clean and degrease the surface, sand lightly, fill holes, and apply a bonding primer. Then paint the panels first, followed by the rails and stiles, and finish with the edges. Working flat prevents drips and lets you cover the surface evenly. Thin coats applied with a quality brush and a foam roller usually produce the smoothest factory-like finish.
Is it better to brush or roll paint on a door?
Most painters use both. A brush works best for the recessed panels, edges, and corners where a roller cannot reach, while a foam or microfiber roller gives a smoother, more even finish on the flat areas. Use an angled brush for cutting in around the panels and load it lightly to avoid brush marks. Roll with light pressure in one direction, and keep a wet edge to prevent lap marks.
Do I need to sand a door before painting?
Yes, in most cases. Sanding scuffs the existing finish so the primer and paint can bond, and it smooths small ridges, old drips, and rough patches. Use fine-grit sandpaper, roughly 120 to 180 grit, and sand with the grain on wood or lightly on painted surfaces. Wipe away dust before priming. If the door has a glossy or factory finish, sanding is especially important for adhesion.
How long should paint dry before closing a door?
Wait until the paint is dry to the touch and no longer tacky before closing the door, which typically takes several hours for latex paint. Full curing takes considerably longer, often one to several weeks, so avoid slamming the door or stacking items against freshly painted surfaces during that period. Check the drying and recoat times printed on your paint can, since they vary by product and humidity.

Frequently asked questions
What is the best way to paint a door?
The most reliable method is to remove the door from its hinges and lay it flat on sawhorses or a drop cloth. Clean and degrease the surface, sand lightly, fill holes, and apply a bonding primer. Then paint the panels first, followed by the rails and stiles, and finish with the edges. Working flat prevents drips and lets you cover the surface evenly. Thin coats applied with a quality brush and a foam roller usually produce the smoothest factory-like finish.
Is it better to brush or roll paint on a door?
Most painters use both. A brush works best for the recessed panels, edges, and corners where a roller cannot reach, while a foam or microfiber roller gives a smoother, more even finish on the flat areas. Use an angled brush for cutting in around the panels and load it lightly to avoid brush marks. Roll with light pressure in one direction, and keep a wet edge to prevent lap marks.
Do I need to sand a door before painting?
Yes, in most cases. Sanding scuffs the existing finish so the primer and paint can bond, and it smooths small ridges, old drips, and rough patches. Use fine-grit sandpaper, roughly 120 to 180 grit, and sand with the grain on wood or lightly on painted surfaces. Wipe away dust before priming. If the door has a glossy or factory finish, sanding is especially important for adhesion.
How long should paint dry before closing a door?
Wait until the paint is dry to the touch and no longer tacky before closing the door, which typically takes several hours for latex paint. Full curing takes considerably longer, often one to several weeks, so avoid slamming the door or stacking items against freshly painted surfaces during that period. Check the drying and recoat times printed on your paint can, since they vary by product and humidity.