How to Install Bathroom Vanity Cabinets: Step-by-Step
how-to · October 9, 2026 · Editorial Team
Table of Contents
- What You'll Need: Tools and Materials for Bathroom Vanity Installation
- Prepare Your Space and Measure for the Vanity Cabinet
- Remove the Old Vanity and Disconnect Plumbing
- Locate Wall Studs and Prepare the Installation Surface
- How to Cut Holes in a Vanity Cabinet for Plumbing and Fixtures
- How to Secure a Bathroom Vanity to the Wall
- Connect Plumbing, Install the Sink, and Finish Your Bathroom Vanity Installation
- Bathroom Vanity Installation Cost and When to Hire a Professional
- Frequently Asked Questions
Last Updated: October 10, 2026
What You'll Need: Tools and Materials for Bathroom Vanity Installation
To install bathroom vanity successfully requires specific tools and materials. Gather everything before you start so you don't waste time mid-project.
Tools you'll need:
- Tape measure
- Level (at least 24 inches)
- Drill with bits
- Screwdriver (both Phillips and flathead)
- Hole saw (for sink and faucet cutouts)
- Jigsaw (for custom plumbing cutouts)
- Stud finder
- Wrench or adjustable wrench
- Caulk gun
- Saw for cutting vanity cabinet if needed
Materials to have on hand:
- Mounting screws (2.5 to 3 inches, rated for wall anchors)
- Shims (for leveling)
- Silicone caulk or sealant
- P-trap and drain assembly
- Water supply lines (flexible hoses)
- Shutoff valve (if not already installed)
- Cabinet fasteners or brackets
When you install bathroom vanity, the process becomes much easier when you have everything ready. Missing a tool halfway through means stopping work and running to get it.
Prepare Your Space and Measure for the Vanity Cabinet
Proper measurement prevents costly mistakes. Most vanity installation problems start with inaccurate measurements or poor planning.
Measure three times before cutting anything:
- Width of the opening (measure at top, middle, and bottom)
- Height from floor to where the countertop will sit
- Depth of the space (from wall to the front edge)
- Distance from walls to existing plumbing holes
Check that your bathroom floor is level. Uneven floors cause vanity cabinets to sit crooked and doors to hang poorly. Use your level to test the floor in multiple spots.
Look at your wall where the vanity will mount. Is it plumb (straight up and down)? Use your level against the wall to check. Out-of-plumb walls are common in older bathrooms. You may need to shim the cabinet to keep it level even if the wall isn't straight.
Shut off the water supply before you remove the old vanity. The shutoff valve is usually under the sink or in a nearby closet. Turn it clockwise until it stops. Test by turning on the faucet to confirm the water is off.
Remove the Old Vanity and Disconnect Plumbing
Removing the old vanity takes patience. Rushing this step damages the wall or plumbing.
Step-by-step removal:
- Open the cabinet doors and drawers fully
- Disconnect the P-trap (the curved pipe under the sink) by loosening the nuts by hand or with a wrench
- Disconnect the water supply lines by turning the connection nuts counterclockwise
- Remove any caulk around the backsplash and countertop using a utility knife
- Check underneath for mounting screws or brackets holding the cabinet to the wall
- Remove all fasteners
- Gently pull the cabinet away from the wall
The vanity cabinet may be heavier than expected. Ask someone to help you pull it out. Tilting it slightly as you pull makes it easier to clear the plumbing and supply lines.
Once the old vanity is out, inspect the wall behind it. Look for water damage, mold, or soft spots in the drywall. If you find damage, repair it now before installing the new cabinet. Let any patched drywall dry completely before proceeding.
Check the existing plumbing. The drain and supply lines should be in good condition. If they're corroded or leaking, replace them now while you have access. This prevents problems later.
Locate Wall Studs and Prepare the Installation Surface
Wall studs are the wooden framing behind your drywall. You must secure the vanity cabinet to studs for proper support.
Use a stud finder to locate studs in the wall where your vanity will mount. Mark the stud locations lightly with a pencil.
The vanity cabinet needs to be mounted at least at two stud locations. If your cabinet is wider than the distance between studs, plan to mount it across three studs for maximum support.
Clean the wall surface where the vanity will sit. Remove any old caulk, paint chips, or debris. A clean surface helps the cabinet sit flush against the wall.
If your wall is damaged or uneven, patch and sand it smooth. Small gaps between the wall and cabinet look unprofessional and trap water. The wall should be as flat as possible where the cabinet mounts.
How to Cut Holes in a Vanity Cabinet for Plumbing and Fixtures
Cutting holes in the vanity cabinet requires precision. Measure twice, cut once.
Measure the hole locations:
- Mark where the sink will sit on the countertop
- Mark the faucet hole location (usually 4 inches from the back)
- Mark the drain hole location (centered under the sink bowl)
- Mark any additional holes for soap dispensers or other fixtures
Use a hole saw to cut the sink opening. Start with a smaller pilot hole, then use the appropriately sized hole saw.
For the faucet hole, use a 1.25-inch hole saw. For the drain, use a 1.5-inch hole saw. These sizes accommodate standard plumbing fixtures.
If your plumbing lines don't align with standard hole locations, use a jigsaw to cut custom openings. Mark the cutout area clearly and cut slowly to avoid splitting the wood.
Sand the edges of all cut holes smooth. Rough edges can damage water supply lines or catch on the sink rim.
Test-fit the sink before permanently installing it. The sink should sit evenly in the countertop opening with no gaps. If gaps exist, adjust the hole size slightly or add shims under the sink rim.
How to Secure a Bathroom Vanity to the Wall
Securing the vanity cabinet properly prevents shifting and water damage.
Installation steps:
- Position the vanity cabinet in the opening and check it with your level
- Adjust shims under the cabinet until it's perfectly level both front-to-back and side-to-side
- Mark the stud locations on the back of the cabinet
- Drill pilot holes at the stud marks (slightly smaller than your mounting screws)
- Install 2.5 to 3-inch screws through the back of the cabinet into the studs
- Use at least two screws per stud for secure fastening
- Check the level again after tightening all screws
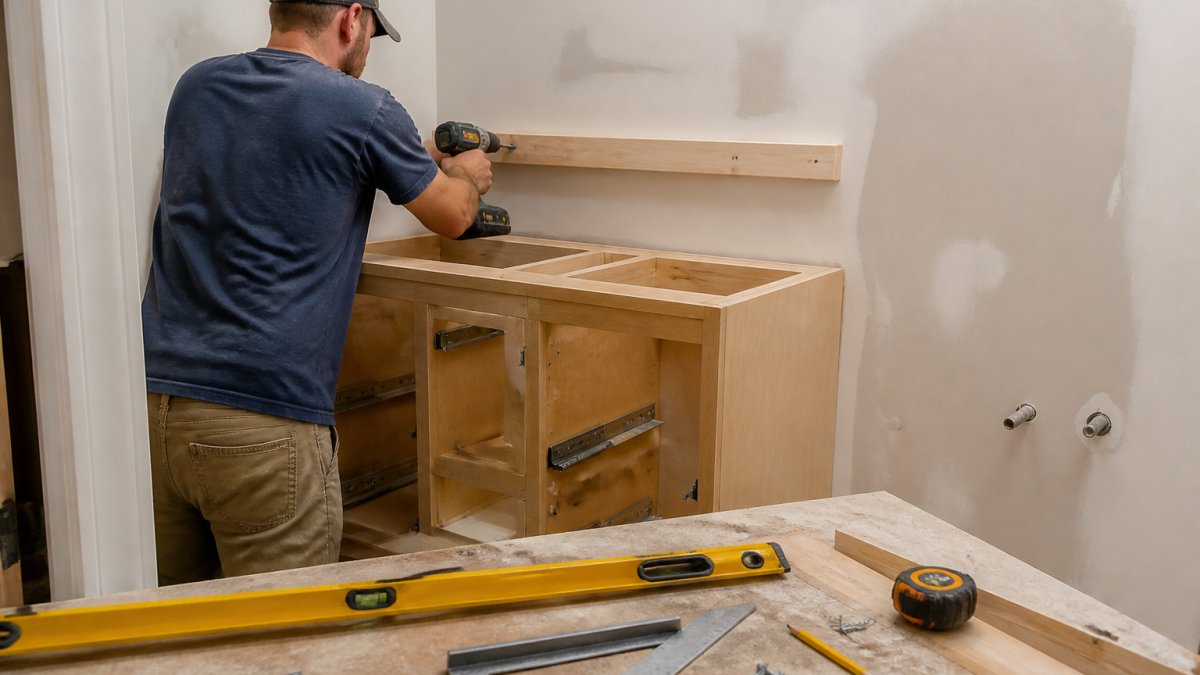 Professional installer using a drill to secure bathroom vanity cabinet mounting screws into wall studs, with level and measuring tools visible on work surface
Don't over-tighten the screws. Over-tightening strips the threads and cracks the cabinet. Tighten until snug, then stop.
For floating vanities with no floor support, install a mounting rail inside the cabinet that connects directly to wall studs. This rail distributes the weight across multiple fastening points and prevents sagging.
Once the cabinet is secure, caulk around the back edges where it meets the wall. Use silicone sealant, not regular caulk. Silicone resists water and mold better than acrylic caulk.
Connect Plumbing, Install the Sink, and Finish Your Bathroom Vanity Installation
Connecting plumbing comes last because you need access while the cabinet is still slightly loose.
Plumbing connection steps:
- Install the P-trap under the sink drain
- Connect the water supply lines to the shutoff valves
- Hand-tighten all connections first
- Check for leaks by turning on the water
- Tighten connections further if leaks appear
- Wipe up any water with a towel
Install the faucet according to the manufacturer's instructions. Most faucets mount from above with bolts tightening underneath. Ensure the faucet is level and secure.
Apply silicone sealant around the sink rim where it meets the countertop. This prevents water from seeping between the sink and cabinet.
Test all water connections and the drain. Turn on the faucet and let water run for a minute. Check under the sink for drips or leaks. Tighten any loose connections.
Install cabinet doors and drawers according to your vanity's instructions. Adjust hinges so doors hang evenly. Drawer slides should glide smoothly without binding.
Caulk around the vanity where it meets the wall and floor. This seals gaps that trap water and dust. Use paintable caulk if you plan to paint, or color-matched caulk if you're staining.
Bathroom Vanity Installation Cost and When to Hire a Professional
The cost of a bathroom vanity installation depends on the vanity cabinet quality, sink type, and whether you need plumbing work.
When to hire a professional:
- Your existing plumbing is damaged or corroded
- Your wall is severely out of plumb or uneven
- Your floor slopes more than 1/2 inch
- You're unsure about locating wall studs
- You don't have the tools needed
- Your bathroom has structural issues
Installing a bathroom vanity yourself saves money on labor. However, mistakes cost more to fix than hiring someone from the start. If you're uncertain about any step, stop and call a professional.
SmithFamilyPaintingandProjects handles bathroom vanity installation as part of complete bathroom renovations. Our team ensures your new vanity is level, secure, and properly connected to plumbing.
For smaller projects like a simple vanity swap with existing plumbing in good condition, a DIY approach works well. For complex situations involving wall damage, plumbing issues, or structural concerns, professional installation prevents costly mistakes.
| Scenario | Best Approach | Why |
|---|---|---|
| New vanity, existing plumbing good | DIY | Straightforward cabinet mounting and connections |
| Damaged plumbing lines | Professional | Requires licensed plumber and wall repairs |
| Out-of-plumb wall or uneven floor | Professional | Needs expertise to solve structural issues |
| Simple cabinet swap | DIY | If you have basic tools and plumbing is sound |
| Full bathroom remodel | Professional | Multiple trades and code compliance needed |
The decision to hire a professional depends on your comfort level, available tools, and the condition of your existing plumbing and walls. According to National Association of Home Builders guidance, bathroom renovations involving structural changes or plumbing work benefit from professional oversight to ensure compliance with building codes.
Most homeowners find that bathroom vanity installation takes 4-6 hours if the plumbing is straightforward. Complex situations take longer. Home improvement safety guidelines from the Consumer Product Safety Commission recommend having a helper present during installation for safety and efficiency.
Bathroom vanity installation is achievable for homeowners with basic carpentry skills and the right tools. The key is careful measurement, proper wall stud fastening, and attention to plumbing details.
Frequently Asked Questions
Can you install a bathroom vanity yourself?
Yes, many homeowners can install a bathroom vanity if you have basic carpentry and plumbing skills. The process requires measuring, locating wall studs, securing the cabinet, and connecting water supply and drain lines. If you're uncomfortable with plumbing or your walls are significantly out of plumb, hiring a professional ensures the job is done correctly and prevents water damage or structural issues.
How much does it cost to install a new vanity and sink?
Installation costs vary based on the vanity cabinet size, countertop material, sink type, plumbing complexity, and whether you're replacing an existing vanity or installing one in a new space. Pricing depends on your specific project scope and local labor rates. For an accurate estimate for your bathroom vanity installation, contact a licensed contractor who can assess your space and provide a detailed quote.
Do you mount a bathroom vanity to the wall?
Most bathroom vanity cabinets are wall-mounted and secured directly to wall studs using mounting screws and fasteners. This supports the weight of the cabinet, countertop, sink, and water supply. Floating vanities are mounted 12 to 18 inches above the floor. If your wall studs are not positioned where you need them, you may need to install blocking between studs to create a secure mounting surface for your vanity cabinet.
How do you connect the sink plumbing after installing a vanity?
After securing the vanity cabinet and installing the sink, connect the hot and cold water supply lines to the shutoff valves beneath the sink. Then attach the P-trap drain assembly to the sink's drain opening and connect it to the wall drain line. Use plumber's tape and silicone sealant to create watertight seals. Test all connections for leaks before finishing the installation.
Frequently asked questions
Can you install a bathroom vanity yourself?
Yes, many homeowners can install a bathroom vanity if you have basic carpentry and plumbing skills. The process requires measuring, locating wall studs, securing the cabinet, and connecting water supply and drain lines. If you're uncomfortable with plumbing or your walls are significantly out of plumb, hiring a professional ensures the job is done correctly and prevents water damage or structural issues.
How much does it cost to install a new vanity and sink?
Installation costs vary based on the vanity cabinet size, countertop material, sink type, plumbing complexity, and whether you're replacing an existing vanity or installing one in a new space. Pricing depends on your specific project scope and local labor rates. For an accurate estimate for your bathroom vanity installation, contact a licensed contractor who can assess your space and provide a detailed quote.
Do you mount a bathroom vanity to the wall?
Most bathroom vanity cabinets are wall-mounted and secured directly to wall studs using mounting screws and fasteners. This supports the weight of the cabinet, countertop, sink, and water supply. Floating vanities are mounted 12 to 18 inches above the floor. If your wall studs are not positioned where you need them, you may need to install blocking between studs to create a secure mounting surface for your vanity cabinet.
How do you connect the sink plumbing after installing a vanity?
After securing the vanity cabinet and installing the sink, connect the hot and cold water supply lines to the shutoff valves beneath the sink. Then attach the P-trap drain assembly to the sink's drain opening and connect it to the wall drain line. Use plumber's tape and silicone sealant to create watertight seals. Test all connections for leaks before finishing the installation.