How to Install a Bathroom Exhaust Fan: Step-by-Step
how-to · October 21, 2026 · Editorial Team
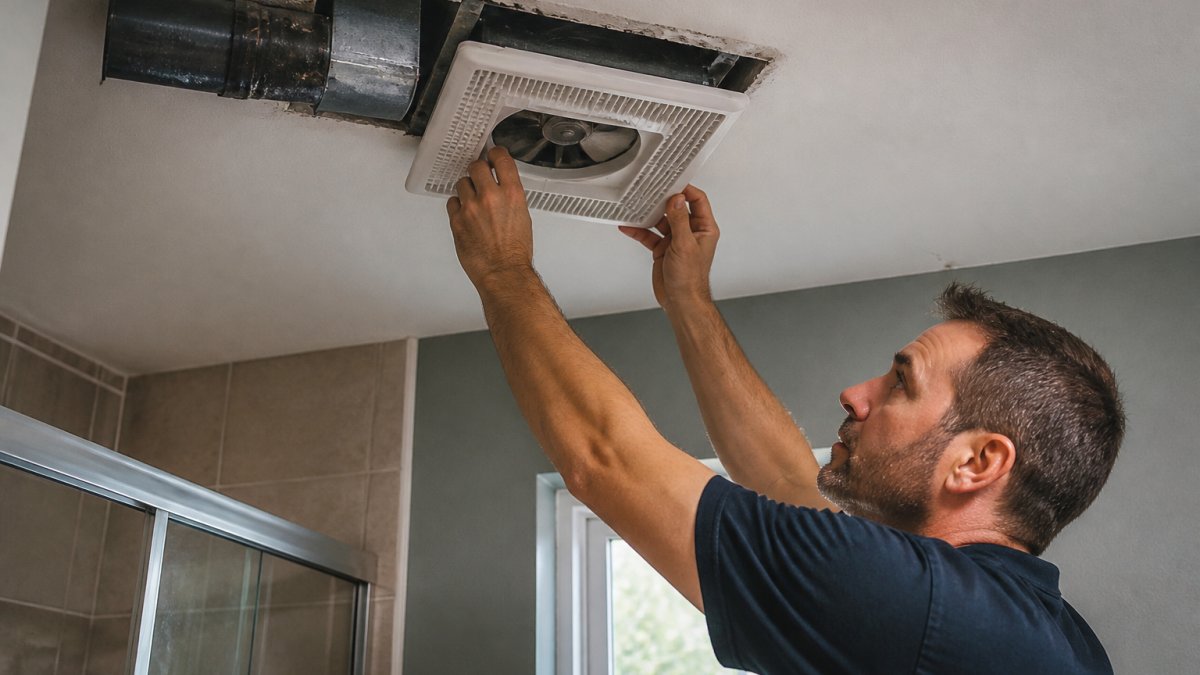
Table of Contents
- Before You Cut: Planning and Sizing Your Bathroom Exhaust Fan
- How to Install a Bathroom Fan Where One Does Not Exist
- Bathroom Exhaust Fan Duct Size and Type: Getting the Route Right
- Bathroom Fan Installation Without Attic Access
- Wiring the Fan and Connecting the Wall Switch
- Sealing, Testing, and Troubleshooting After Installation
- Frequently Asked Questions
Last Updated: October 20, 2026
Before You Cut: Planning and Sizing Your Bathroom Exhaust Fan
A bathroom exhaust fan is a mechanical ventilation device that pulls moist air out of the room and pushes it outdoors through ductwork.
Bathroom Exhaust Fan CFM Sizing
CFM stands for cubic feet per minute, and it measures how much air a fan moves. The standard approach is simple: match the fan's CFM to the room's square footage.
Here is the rule most contractors use:
- Under 50 square feet: 50 CFM
- 50 to 100 square feet: 1 CFM per square foot
- Over 100 square feet: add 50 CFM to the square footage total
- Each toilet or shower beyond the first: add 50 CFM
Measure length times width, then round up. A 5-by-8 bathroom is 40 square feet, so a 50 CFM fan works. A 10-by-12 bathroom is 120 square feet, so you need 170 CFM.
For a deeper look at the math, the Home Ventilating Institute's ventilation standards publishes the sizing tables contractors rely on.
How to Install a Bathroom Fan Where One Does Not Exist
Installing a bathroom exhaust fan where none exists means cutting a new ceiling opening, running duct, and adding a switch. Plan the full route before you touch drywall.
 Homeowner marking a ceiling opening for a new bathroom exhaust fan installation
Start by choosing the fan location. Put it over the shower or tub, not in the middle of the room.
Next, confirm what is above the ceiling. Poke a small hole and check for joists, pipes, and wires.
Then mark and cut the ceiling opening:
- Trace the housing template on the ceiling with a pencil.
- Score the drywall with a utility knife.
- Cut along the line with a drywall saw.
- Test-fit the housing before going further.
A common mistake is cutting before checking joist spacing. If a joist runs through your planned spot, shift the opening a few inches rather than notching the framing.
Bathroom Exhaust Fan Duct Size and Type: Getting the Route Right
Bathroom exhaust fan duct size should match the fan's discharge, usually a four-inch duct for standard residential fans.
Use rigid galvanized duct where you can. It moves air better than flex duct and collects less lint.
Insulate the duct if it passes through cold space like an attic. Warm moist air hitting a cold duct condenses inside, and that water has to go somewhere.
Route the duct to an exterior termination. Options include:
- Roof cap: exits through the roof, good for straight-up runs
- Wall cap: exits through a side wall, shorter runs in many homes
- Vent hood with a backdraft damper: stops outside air from flowing back in
The U.S. Department of Energy's ventilation guidance notes that short, straight, insulated duct runs keep fans working at their rated capacity.
Keep bends to a minimum. Every elbow cuts airflow, so plan the duct route before you cut anything.
Bathroom Fan Installation Without Attic Access
Bathroom fan installation without attic access is harder but doable. You work through the ceiling opening instead of standing above it.
Start by choosing a fan designed for retrofit work. Many models have expandable mounting brackets that grip the joists from below, so you do not need to climb into the attic.
Here is the process:
- Cut the ceiling opening using the housing template.
- Slide the housing into the opening.
- Extend the mounting brackets until they meet the joists.
- Tighten the screws so the housing clamps firmly to the framing.
- Connect the duct to the housing collar and seal the seam with foil tape.
For duct routing without attic access, look for a short path to an exterior wall.
If the space above is truly sealed, call a licensed contractor. Cutting into structure you cannot see is where DIY projects go wrong.
Wiring the Fan and Connecting the Wall Switch
Electrical wiring is the step where mistakes get expensive, and it is also where most guides stay vague. This section names the actual code references and the specific conditions that should send you to a licensed electrician.
Turn off the circuit breaker first. Confirm power is dead with a non-contact voltage tester at the switch box and at the fan housing.
Code references you should know before you start:
- GFCI protection: The National Electrical Code (NEC) Article 210.8 requires GFCI protection for receptacles in bathrooms, and Article 210.8(A) covers dwelling-unit bathrooms. Whether the fan circuit itself needs GFCI depends on your local amendment and the fan's location relative to the tub or shower. Check with your local building department, many jurisdictions require GFCI protection for the fan circuit when the fan is within the tub/shower zone.
- Dedicated circuit: NEC Article 210.11(C)(3) requires a 20-amp branch circuit for bathroom receptacles. The fan itself is often on a separate lighting circuit, but some local amendments require the fan on its own switch or on a timer. Confirm before you pull cable.
- Box fill: NEC Article 314.16 limits how many conductors and devices can fit in a box. A crowded switch box with a dimmer, a fan timer, and a GFCI is a common code violation. Count your conductors and use the box-fill tables before you add a device.
- Cable clamping: NEC Article 334.30 requires cable to be secured within 12 inches of the box and every 4.5 feet along the run. A missing clamp at the fan housing knockout is a common inspection failure.
Permits: Most jurisdictions require an electrical permit for new fan circuits, and many require a building permit when you cut a new ceiling opening or penetrate an exterior wall.
The basic wiring sequence:
- Run cable from the power supply to the switch box.
- Run cable from the switch box to the fan housing.
- Strip the wire ends with a wire stripper.
- Connect black to black, white to white, and ground to ground.
- Secure the cable at the housing with a cable clamp through the knockout plug.
- Cap connections with wire nuts and tuck them into the junction box.
If you are connecting to an existing switch, confirm the circuit has enough capacity and that the switch box has a neutral wire.
When to hire a licensed electrician:
- The panel is full or you need a new breaker.
- The existing wiring is aluminum, knob-and-tube, or otherwise older than the home's current code cycle.
- You cannot confirm the circuit's amperage or the box-fill calculation.
- Your local jurisdiction requires a licensed electrician for any new circuit.
- The fan is within the tub/shower zone and you are unsure about GFCI requirements.
Sealing, Testing, and Troubleshooting After Installation
Sealing and testing separate a fan that lasts from one that rattles and leaks air. Work through this checklist before you call the job done.
- Seal the gap between the housing and drywall with caulk
- Tape every duct seam with foil tape
- Insulate duct that runs through cold space
- Confirm the backdraft damper opens freely
- Turn the power back on at the circuit breaker
- Test the wall switch
- Hold a tissue to the grille to confirm suction
- Listen for rattles or scraping
Diagnosing weak airflow. A tissue test that barely flutters means the fan is moving far less air than its rating. Work through these causes in order of likelihood:
- Crushed or kinked flex duct. Flex duct that is pinched at a bend or compressed behind a joist can lose a large share of its airflow. Straighten the run or replace the flex with rigid galvanized duct.
- Undersized duct. A 4-inch duct is standard for most residential fans, but a long run or a high-CFM fan may need 5-inch or 6-inch duct. Check the fan's installation manual for the minimum duct diameter and the maximum equivalent run length.
- Too many elbows. Each 90-degree elbow adds equivalent length to the run. The fan manual usually lists an equivalent-length table; count your elbows against it.
- Stuck or backwards damper. A backdraft damper that is stuck closed or installed backwards blocks airflow. Confirm the damper flap opens toward the outdoors when the fan runs.
- Clogged grille or fan blade. Lint and dust build up on the grille and blade over time. Remove the grille and clean it, and wipe the blade with a damp cloth.
- Undersized fan. If the fan was sized for a smaller bathroom, no amount of duct work will fix it. Recalculate CFM against the room's square footage.
Diagnosing noise and vibration. A fan that rattles or hums louder than it did at installation usually has one of these problems:
- Loose mounting screws. Tighten the housing-to-joist screws and the bracket screws.
- Duct contact. Flex duct touching a joist or drywall transmits vibration. Add a short section of insulated flex or a hanger to isolate it.
- Debris on the blade. A small piece of drywall or insulation stuck to the blade throws it out of balance. Remove the grille and inspect.
- Loose damper. A damper that flaps in the airstream rattles. Confirm it is seated correctly.
- Motor bearing wear. A grinding or squealing sound that persists after cleaning usually means the motor is failing. Replace the fan rather than repair it.
Diagnosing moisture problems. Moisture on the ceiling, peeling paint, or mold after installation usually means one of three things: the fan is undersized, the duct is leaking, or the run is too long.
Condensation inside the duct points to missing insulation. Warm moist air hitting a cold duct condenses inside, and that water has to go somewhere.
Backdraft and outside air. If you feel cold air coming in when the fan is off, the backdraft damper is not sealing.
For building-science detail on how moisture moves through a home, the EPA's guide to indoor air quality is a solid reference.
Frequently Asked Questions
How do you install a bathroom exhaust fan where one does not exist?
Start by sizing the fan to the room's cubic feet and choosing a location near the shower or tub, ideally within 3 feet of the moisture source. Mark the ceiling opening using the housing template, cut through drywall, and confirm no joists or pipes are in the way. From there, mount the housing, run duct to an exterior wall or roof cap, and connect wiring to a switch. If you are unsure about cutting into structural members or running new circuits, a licensed contractor can handle the layout and code requirements.
What kind of duct do I need for a bathroom exhaust fan?
Use smooth, rigid metal duct in 4-inch or 6-inch diameter, matching the fan's discharge collar. Flexible foil duct is easier to route but collects lint and reduces airflow, so keep bends gradual and runs short. Insulate the duct in cold spaces to prevent condensation, and slope it slightly toward the exterior termination so moisture drains out. Always terminate at a wall cap or roof cap with a backdraft damper, never into an attic or crawlspace.
Can I install a bathroom exhaust fan without attic access?
Yes, though the approach changes. With no attic above, you can route duct horizontally through the ceiling joist bay to an exterior wall, or use a through-wall fan that vents directly outside. A remote inline fan mounted in a closet or soffit can also work when ceiling space is tight. Expect more drywall patching and careful measuring. If the bathroom sits on an interior wall with no exterior path, a licensed contractor can identify the best route before you cut.
How long does it take to install a bathroom exhaust fan?
A straight replacement of an existing fan typically takes 1 to 2 hours for an experienced DIYer. A new installation where no fan exists, including cutting the ceiling, running duct, and adding a switch, usually takes 4 to 8 hours spread across a day or two. Wiring a new circuit or repairing drywall adds time. If you need the work done alongside a bathroom remodel, a contractor can sequence it with tile and paint so you are not patching twice.
Frequently asked questions
How do you install a bathroom exhaust fan where one does not exist?
Start by sizing the fan to the room's cubic feet and choosing a location near the shower or tub, ideally within 3 feet of the moisture source. Mark the ceiling opening using the housing template, cut through drywall, and confirm no joists or pipes are in the way. From there, mount the housing, run duct to an exterior wall or roof cap, and connect wiring to a switch. If you are unsure about cutting into structural members or running new circuits, a licensed contractor can handle the layout and code requirements.
What kind of duct do I need for a bathroom exhaust fan?
Use smooth, rigid metal duct in 4-inch or 6-inch diameter, matching the fan's discharge collar. Flexible foil duct is easier to route but collects lint and reduces airflow, so keep bends gradual and runs short. Insulate the duct in cold spaces to prevent condensation, and slope it slightly toward the exterior termination so moisture drains out. Always terminate at a wall cap or roof cap with a backdraft damper, never into an attic or crawlspace.
Can I install a bathroom exhaust fan without attic access?
Yes, though the approach changes. With no attic above, you can route duct horizontally through the ceiling joist bay to an exterior wall, or use a through-wall fan that vents directly outside. A remote inline fan mounted in a closet or soffit can also work when ceiling space is tight. Expect more drywall patching and careful measuring. If the bathroom sits on an interior wall with no exterior path, a licensed contractor can identify the best route before you cut.
How long does it take to install a bathroom exhaust fan?
A straight replacement of an existing fan typically takes 1 to 2 hours for an experienced DIYer. A new installation where no fan exists, including cutting the ceiling, running duct, and adding a switch, usually takes 4 to 8 hours spread across a day or two. Wiring a new circuit or repairing drywall adds time. If you need the work done alongside a bathroom remodel, a contractor can sequence it with tile and paint so you are not patching twice.