How to Fix Squeaky Floorboards in Old Homes
how-to · October 14, 2026 · Editorial Team
Table of Contents
- What Causes Floors to Squeak When You Walk on Them
- How to Locate the Noise and Check Floor Movement Safely
- How to Fix Squeaky Floors From Above
- How to Fix a Squeaky Subfloor From Below
- Squeak No More Floor Repair Kit: What It Does and When to Use It
- Preserving Historic Floors: Reversible Repairs for Old Homes
- When Squeaks Signal a Bigger Problem
- Conclusion
- Frequently Asked Questions
Last Updated: October 13, 2026
What Causes Floors to Squeak When You Walk on Them
Squeaky floorboards are almost always caused by movement. When a board shifts, it rubs against a nail, a neighboring board, or a floor joist, and that friction makes noise.
In older homes, three things make this worse over time:
- Loose nails. Old cut nails work their way up as wood shrinks and swells with the seasons.
- Shrinking wood. Floorboards lose moisture over decades and pull away from the joists below.
- Shifting framing. Floor joists can twist or sag, opening small gaps under the boards.
The wood itself isn't usually the problem. The movement is.
Movement, Friction, and Loose Fasteners
Wood floors move. That's normal. Squeaky floorboards happen when one part of the floor moves differently than the part next to it.
The U.S. Department of Agriculture's Wood Handbook explains how wood expands and contracts with moisture changes.
When a fastener no longer holds a board tight, the board lifts slightly with each step. The rubbing against the joist or a nail shank creates the squeak.
How to Locate the Noise and Check Floor Movement Safely
Finding the exact source takes patience. Walk across the floor slowly and listen for where the sound starts.
Try these steps:
- Have someone walk the floor while you listen from below, if you have basement or crawlspace access.
- Mark the noisy spots with painter's tape.
- Press down on each marked board with your hand to feel for movement.
- Look for gaps between boards and around old nail heads.
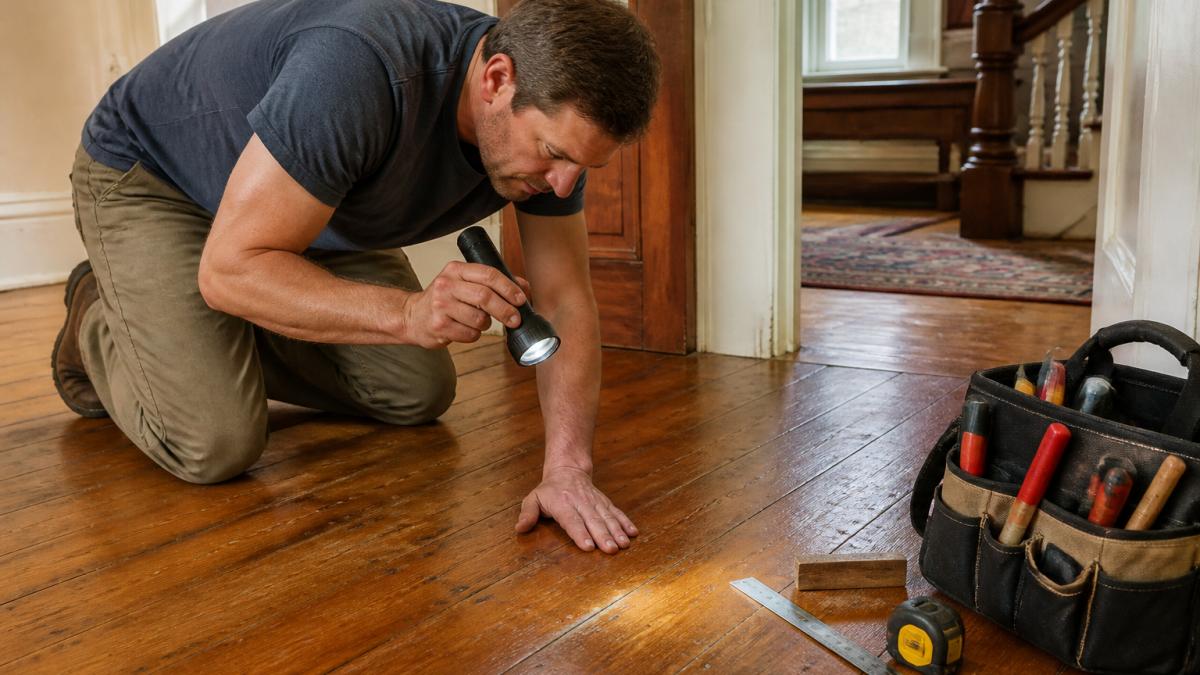 A homeowner kneeling on an old hardwood floor in a historic home, pressing down on a floorboard with one hand while holding a flashlight in the other, looking for movement and gaps near a doorway
Diagnostic Decision Tree: Construction and Access
Use this to pick your repair path:
| Your Situation | Best Approach |
|---|---|
| Finished floor, no underside access | Fix from above with screws |
| Basement or crawlspace access | Fix from below with shims or blocking |
| Historic or original flooring | Use reversible repairs only |
| Wide gaps plus soft spots | Inspect for moisture or framing damage first |
Safety Checks Before You Fasten Anything
Before you drive a single screw, do these checks:
- Confirm no wiring or plumbing runs under the board. Old homes often have pipes and wires notched into joists.
- Wear safety glasses and gloves.
- Check that the floor isn't spongy. Soft spots can mean rot, not just a loose board.
Skipping these steps is how a simple repair turns into a costly one.
How to Fix Squeaky Floors From Above
Fixing from above is the most common method, and it works well when you can't get under the floor. The trade-off is that every fastener leaves a small mark in the finished surface, so the goal is to place as few fasteners as possible, in the right spots, the first time.
Step 1: Locate the Joists Before You Drill
You cannot fix a squeak from above unless the screw reaches a joist. A screw driven into a board that isn't sitting on a joist will not stop the movement.
- From below, if you have access: measure from a known reference (a foundation wall, a beam, or a plumbing stack) to each joist and transfer those measurements to the floor above.
- From above, with no access: use a stud finder set to deep-scan mode, or tap the floor and listen for the change in tone where a joist sits under the board.
- On exposed joists in a basement: note the spacing. Older homes often use 16-inch on-center spacing, but 24-inch and irregular spacing show up in pre-1950 framing.
Mark each joist line with painter's tape so you don't lose the position once you start.
Step 2: Confirm Nothing Is Buried Under the Board
Before any bit touches the floor, check for concealed services. In old homes, plumbers and electricians frequently notched pipes and wires into the top of joists, directly under the finished floor.
- Look for outlets, switches, and radiators on the wall nearest the squeak, wiring and supply lines often run parallel to joists near these fixtures.
- If the home has radiant floor heating, do not drill at all without locating the tubing first.
- If you can see the joist bay from below, confirm it is clear before drilling from above.
Step 3: Drill the Pilot Hole
Use a bit sized to the shank of your screw, not the threads. For a typical #8 trim-head screw, a 1/8-inch bit is a reasonable starting point; for harder, older wood, go one size smaller and let the screw cut its own path.
- Drill at a slight angle, roughly 15 degrees off vertical, so the screw bites into the joist rather than spinning in the gap.
- Drill through the finished board and into the joist. Stop when you feel the bit break through the board's underside.
- On very dry, brittle boards, drill slowly and clear the flutes often. Old wood splits fast.
Step 4: Drive the Screw and Countersink
Drive the screw until the head sits just below the surface, deep enough to hide, shallow enough that the board isn't crushed. Over-tightening is the most common mistake: it strips the hole and the board lifts again within a season.
If the screw spins without tightening, back it out, plug the hole with a glued wood dowel, and try again a half-inch away along the same joist line.
Step 5: Fill, Sand, and Blend
- Fill the countersunk hole with a color-matched wood filler or a wax stick that matches the floor's current tone, not its original tone.
- Let the filler cure per the manufacturer's instructions before sanding.
- Sand flush with a fine grit, then touch up with the same finish the floor currently wears, oil, polyurethane, or wax.
Step 6: Test Before You Move On
Walk the repaired area with your full weight, not a light step. If the squeak persists, the screw missed the joist or the movement is coming from a neighboring board. Re-mark and repeat.
How to Fix a Squeaky Subfloor From Below
When you have basement or crawlspace access, fixing from below is cleaner. You avoid touching the finished floor at all.
Two reliable methods:
- Shimming. Tap thin wood shims into the gap between the subfloor and joist. Add construction adhesive to keep them in place.
- Blocking. Screw a short block of wood alongside the joist to support the loose subfloor panel.
Both methods stop the up-and-down movement that causes the squeak. Work from a stable position and watch for pipes and wires.
Squeak No More Floor Repair Kit: What It Does and When to Use It
A squeak no more floor repair kit is a set of tools designed to fix squeaky boards from above without removing flooring. Most kits include a snap-off screw system, a pilot drill bit, and a depth-setting tool.
These kits are best for:
- Finished floors where you can't get underneath
- A handful of squeaks in high-traffic areas
- Homeowners who want a fast, tidy fix
They work well for isolated squeaks. For widespread movement or a soft, spongy floor, a kit won't solve the underlying issue.
Preserving Historic Floors: Reversible Repairs for Old Homes
Original flooring in a Victorian or 1940s house deserves careful handling. Reversibility matters. Every repair should be something a future owner can undo without ruining the wood, and ideally without leaving a mark that a refinisher can't hide.
What Makes a Repair Reversible
A reversible repair is one that can be removed without cutting, gluing, or altering the original board. That rules out construction adhesive on original flooring, and it rules out any fastener that has to be cut out to remove.
Good options for historic homes:
- Shimming from below, which leaves the finished floor untouched
- Using screws that can be backed out later
- Avoiding adhesives on original boards
Fasteners That Suit Old Boards
Old floors are usually thinner than modern flooring and made from denser, slower-grown wood. Both facts change your fastener choice.
- Trim-head screws have a small head that sinks cleanly and leaves a hole you can fill with a wax stick. They are the least visible option for face-fastening.
- Square-drive or rectangular-head screws grip better in old wood than Phillips-head screws, which cam out easily.
- Cut nails are what the original builder likely used. If you replace a cut nail, match the head style so the repair doesn't stand out under a refinish.
Minimizing Visible Damage
Every hole you add is a hole a future refinisher has to deal with. Three habits keep the damage small:
- Group fasteners along joist lines. A row of holes hidden under a rug or along a wall is far less noticeable than scattered holes in the middle of a room.
- Pre-drill every hole in old boards. Dry, brittle wood splits easily, and a split board is a much bigger repair than a squeak.
- Use a depth-setting collar on your bit so you don't punch through the board's underside and into a pipe or wire.
Matching the Existing Finish
A filled hole that doesn't match the surrounding finish is more visible than the hole itself. Before you fill, identify what the floor is wearing:
- Wax, common on older floors, soft, and easy to touch up with a matching wax stick.
- Oil, penetrates the wood and darkens over time; touch-ups need to match the current tone, not the original.
- Polyurethane, sits on top of the wood and can be spot-repaired, but the sheen has to match or the patch will show.
If you can't identify the finish, test a small area in a closet or under a piece of furniture before touching the visible floor.
When to Bring In a Preservation-Minded Professional
If the floor is original to the house, has a distinctive pattern, or is made from a species that's no longer commonly milled, the cost of a mistake is high. A professional evaluation is worth it before you drill.
For guidance on preserving older structures, the National Park Service preservation standards offer detailed direction on reversible treatments.
If your home has irreplaceable original flooring, this is the point where a professional evaluation pays off.
When Squeaks Signal a Bigger Problem
Most squeaks are harmless. Some are not.
Watch for these warning signs:
- A floor that feels soft or spongy underfoot
- Boards that sag or dip noticeably
- A musty smell near the squeak
Any of these can point to moisture damage, rot, or a framing problem. In those cases, the squeak is a symptom, and the real fix is structural.
The U.S. Environmental Protection Agency's moisture control guidance notes that unchecked moisture in a home can lead to wood decay and mold.
If you're not sure whether your squeak is simple or serious, get it checked.
Conclusion
A squeaky floor in an old home is rarely just an annoyance. It's your house telling you something is moving, and the fix depends on what you find.
For simple, isolated squeaks, the steps above will get you there. For soft spots, water damage, or widespread movement, it's time for a professional look.
SmithFamilyPaintingandProjects is a licensed, bonded, and insured Class A contractor serving homeowners across Southside Virginia. We bring honest communication, skilled workmanship, and full project support from start to finish, whether it's a single repair or a larger renovation.
Call 434-944-4649 to schedule an assessment and get your floors quiet and solid again.
Frequently Asked Questions
Can you fix squeaky floorboards without removing the flooring?
Yes. Most squeaky floorboards in old homes can be fixed from above without pulling up the finished floor. You can drive screws through the finished floor into the joists, or use a repair kit that snaps off below the surface. If you have access from a basement or crawl space, fixing from below avoids any visible fasteners on the floor surface. Only severe cases involving rot or structural movement require removing flooring.
What causes floors to squeak when you walk on them?
Squeaks come from movement between wood surfaces. When you walk across the floor, loose boards rub against each other or against nails and joists, creating friction that produces the squeaking sound. In old homes, this is common because fasteners loosen over decades, wood shrinks and swells with seasonal humidity changes, and subfloor panels separate slightly from the joists beneath them.
How do you use a squeak no more floor repair kit?
A squeak no more floor repair kit uses a specially designed screw and fixture that pulls the subfloor tight against the joist from above. You drill a small pilot hole through the finished floor, drive the screw until the subfloor is secured, then snap off the screw head below the surface. Fill the small hole with matching wood filler. These kits work well on carpeted floors and hardwood where you want to avoid visible fasteners.
When should you call a professional to repair a squeaky floor?
Call a professional if the floor feels soft or spongy underfoot, if you notice sagging or visible gaps along the baseboard, or if the squeak appeared suddenly after a water leak. These signs can point to moisture damage, weakened joists, or subfloor rot that simple screw fixes will not solve. A licensed contractor can assess whether the issue is cosmetic or structural before you invest in surface repairs.
Frequently asked questions
Can you fix squeaky floorboards without removing the flooring?
Yes. Most squeaky floorboards in old homes can be fixed from above without pulling up the finished floor. You can drive screws through the finished floor into the joists, or use a repair kit that snaps off below the surface. If you have access from a basement or crawl space, fixing from below avoids any visible fasteners on the floor surface. Only severe cases involving rot or structural movement require removing flooring.
What causes floors to squeak when you walk on them?
Squeaks come from movement between wood surfaces. When you walk across the floor, loose boards rub against each other or against nails and joists, creating friction that produces the squeaking sound. In old homes, this is common because fasteners loosen over decades, wood shrinks and swells with seasonal humidity changes, and subfloor panels separate slightly from the joists beneath them.
How do you use a squeak no more floor repair kit?
A squeak no more floor repair kit uses a specially designed screw and fixture that pulls the subfloor tight against the joist from above. You drill a small pilot hole through the finished floor, drive the screw until the subfloor is secured, then snap off the screw head below the surface. Fill the small hole with matching wood filler. These kits work well on carpeted floors and hardwood where you want to avoid visible fasteners.
When should you call a professional to repair a squeaky floor?
Call a professional if the floor feels soft or spongy underfoot, if you notice sagging or visible gaps along the baseboard, or if the squeak appeared suddenly after a water leak. These signs can point to moisture damage, weakened joists, or subfloor rot that simple screw fixes will not solve. A licensed contractor can assess whether the issue is cosmetic or structural before you invest in surface repairs.