Emergency Water Damage Repair Steps
how-to · September 24, 2026 · Editorial Team
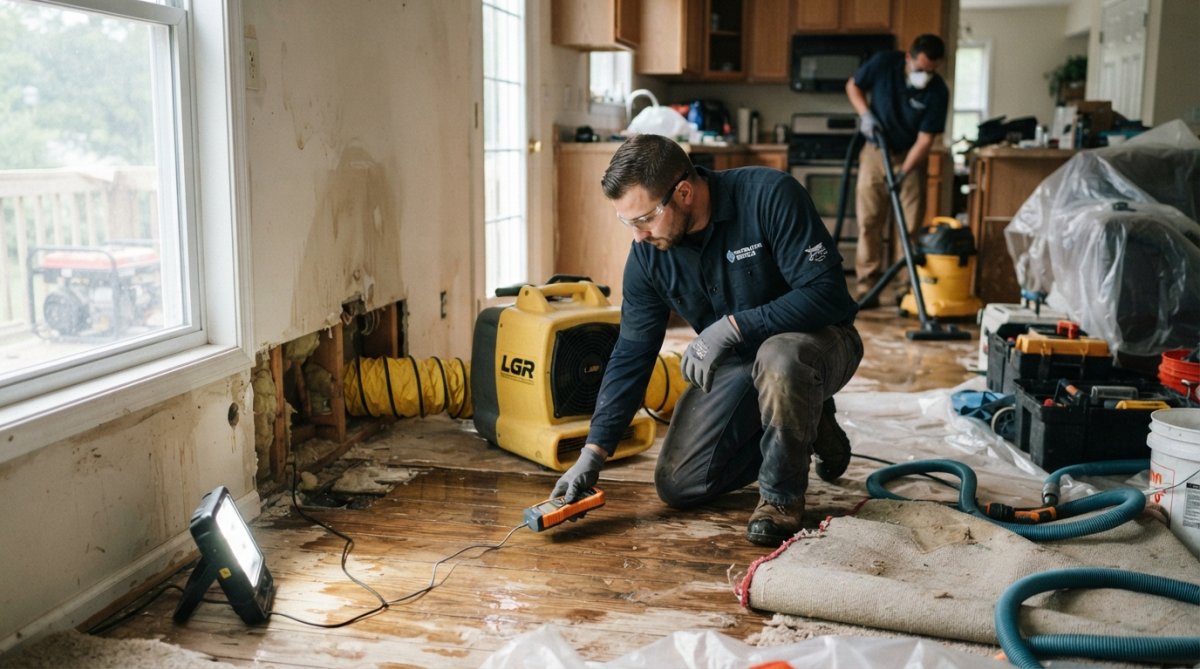
Table of Contents
- Immediate Actions Within the First Hour of Water Damage
- Visual Signs of Water Damage to Inspect
- Tools for Detecting Water Leaks Behind Walls
- Water Damage Restoration Timeline: What to Expect
- Preventing Mold After Water Damage
- When to Call a Professional for Water Damage Repair
- Frequently Asked Questions
Last Updated: September 24, 2026
Water damage strikes fast. A burst pipe, roof leak, or flooded basement can escalate in hours. The emergency water damage repair steps you take in the first hour can significantly impact the recovery process.
Immediate Actions Within the First Hour of Water Damage
The first 60 minutes are critical. Water soaks into drywall, carpet, and wood, and mold can begin growing within 24 to 48 hours (the CDC). Stop the water source, prevent further damage, and determine whether you're dealing with an actual leak or surface condensation, this distinction changes your next steps.
Step 1: Identify the Water Source and Stop It
If water is actively flowing or pooling:
- Shut off the water supply. If the leak is from a pipe, find your main water valve and turn it off. Most homes have one near the street or in the basement. If you can't locate it, call a plumber immediately. Do not wait.
- Turn off electricity. Water and electricity don't mix. Switch off the breaker for the affected area. If water is near outlets, appliances, or the electrical panel, turn off the main power to the house.
- If water is from a roof leak or exterior source, move to higher ground and call a roofer or restoration company. You cannot stop this source yourself.
Step 2: Distinguish Between Condensation and an Actual Leak (Critical)
Signs of surface condensation (not an emergency): Water appears only on windows, mirrors, or outer wall surfaces; it appears after showers or cooking; the wall feels dry when pressed; moisture disappears within hours of ventilation; the area is small and localized to a bathroom or kitchen.
Step 3: Remove Standing Water (Material-Specific Approach)
For carpeted areas: Use a wet vacuum to extract water. Lift carpet edges to check padding, if soaked, it must be replaced as wet padding breeds mold. If water has sat for more than 2 hours, plan for pad replacement.
Step 4: Move Items to Dry Areas
Move furniture, electronics, documents, and belongings out immediately. Unplug electronics and move to a dry room, do not turn on until completely dry. Place wet documents flat to dry or freeze them. Move furniture to prevent water absorption. Remove clothing and textiles.
Step 5: Start the Drying Process
Once standing water is removed, drying begins immediately. Open windows and doors if weather permits and the water source is not exterior. Use fans to push air around. Run a dehumidifier (rent one for $20-$40/day if needed), essential for preventing mold. Keep the space warm to speed drying.
Step 6: Document Everything for Insurance
Take photos and videos of all damage before cleanup. Photograph standing water, damaged items, and affected areas from multiple angles. Document the water source, date, time, weather conditions, and receipts for supplies. This documentation is essential for your insurance claim.
Visual Signs of Water Damage to Inspect
Water damage often hides behind walls and under floors. Early detection prevents small problems from becoming catastrophes. Common visual indicators are discoloration, peeling paint, warping, and musty odors.
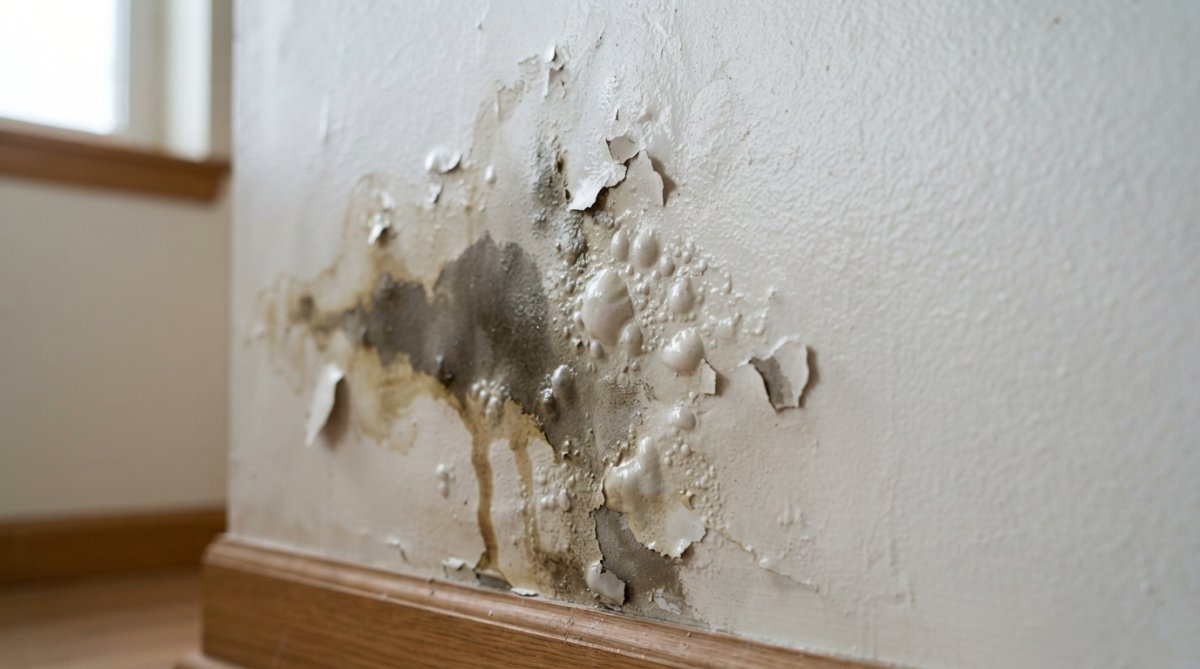 Infographic highlighting visual signs like bubbling paint and stains to identify before following water damage repair steps.
Discoloration and Water Stains
Water stains are the clearest sign of water damage. They appear as yellowish, brownish, or dark marks on walls, ceilings, and floors. Ceiling stains suggest roof leaks or plumbing above; wall stains suggest pipe leaks or exterior seepage; floor stains suggest flooding. Act fast, fresh stains are easier to address.
Peeling, Bubbling, and Flaking Paint
Paint bubbles and peels when water gets trapped behind it. Bubbles feel hollow; flaking paint crumbles. This happens most in bathrooms, kitchens, and basements. Persistent bubbling suggests an actual leak, not just humidity. Check the wall behind bubbling paint, if soft, wet, or discolored, water damage is present. Find the source before repainting.
Warping and Sagging Walls
Walls that bow, bulge, or sag are absorbing water. Drywall softens and weakens; studs and framing swell and warp. Run your hand along the wall to check for unevenness. Sagging ceilings are especially serious and can collapse. This is not a DIY fix, call a professional immediately.
Musty Odors and Mildew Growth
A musty smell is almost always a sign of mold or mildew. Mold grows in dark, damp places inside walls, under flooring, and in crawl spaces. Mildew appears as black, green, or white spots. By the time you smell mold, it's already established. If you notice a musty odor after water damage, moisture is still present and mold is growing, professional remediation is necessary.
Tools for Detecting Water Leaks Behind Walls
Water damage often hides in wall cavities, under flooring, or in attics. Detecting hidden moisture prevents mold and structural failure. The challenge is distinguishing between surface condensation and actual water intrusion.
Moisture Meters: How to Use and Interpret Readings
A moisture meter is the most practical DIY tool for confirming hidden leaks. These devices measure water content in drywall, wood, and carpet. Meters cost $15-$50 and come in pin-type or pinless versions.
Interpreting the readings:
- 0-12% moisture content: Normal for most materials. No water damage present.
- 13-17% moisture content: Elevated but not yet dangerous. Monitor the area closely. This range often indicates surface condensation or high humidity rather than active leaks.
- 18-25% moisture content: Concerning. Water intrusion is likely. Check for visible signs (discoloration, soft spots) and investigate the source.
- Above 25% moisture content: Severe water damage. Professional remediation is necessary.
Thermal Imaging Cameras
Thermal imaging cameras show temperature differences that reveal moisture, wet areas appear cooler. Many restoration companies offer thermal imaging as part of their inspection service. It reveals moisture in wall cavities, under flooring, and attics without cutting into materials. Wet zones appear blue or purple; dry zones appear red or yellow. This visual evidence is valuable for insurance claims.
Visual Inspection and the Soft-Spot Test
Visual inspection is free. Look for discoloration, soft spots, and peeling paint. Press your palm firmly against suspect walls and floors, soft spots indicate water saturation and require professional assessment. Check corners, baseboards, and areas near plumbing or exterior walls. Water pools in low spots, so inspect the lowest points first.
Humidity Monitors for Ongoing Detection
Humidity monitors track moisture in the air. If humidity stays above 60%, mold will grow. These devices cost $10-$30 and help monitor after water removal. If humidity climbs back up after drying, it signals incomplete drying or a new leak. For serious concerns or elevated moisture readings, hire a professional with thermal cameras, borescopes, and moisture mapping systems.
Water Damage Restoration Timeline: What to Expect
Day 1-3: Assessment and Water Removal A professional team documents damage, identifies and shuts off the water source, extracts standing water, and places dehumidifiers and fans. This phase is critical, faster water removal means less damage.
Preventing Mold After Water Damage
Mold is the biggest threat after water damage. Keep humidity below 50% using dehumidifiers and fans. Ensure proper ventilation in bathrooms, kitchens, and basements. Clean all affected surfaces with mild detergent and apply antimicrobial treatments. Monitor for musty odors, visible growth, or discoloration, professional remediation is necessary if mold appears.
When to Call a Professional for Water Damage Repair
Call immediately if:
- Water is still flowing or spreading
- The water source is unknown or you can't stop it
- Water has reached electrical systems or appliances
- The affected area is larger than a few square feet
- The water came from a sewage backup or contaminated source
- You see or smell mold
- Drywall, insulation, or flooring is saturated
Call within 24 hours if:
- You notice soft or spongy walls or floors
- Discoloration or water stains are spreading
- Humidity remains high after 12 hours of ventilation
- You're unsure whether damage is present
Water damage restoration requires specialized equipment, expertise, and insurance knowledge. Professionals have industrial-grade dehumidifiers, air movers, and moisture detection tools. They work with insurance companies and document everything properly.
Frequently Asked Questions
What are the immediate steps to take after a pipe bursts?
First, shut off your main water supply immediately to stop the flow. Turn off electricity to affected areas if water is near outlets or appliances. Remove standing water using a wet vacuum or mop, and open windows and doors for ventilation. Move furniture and personal items away from the damaged area. Document the damage with photos for insurance purposes. Then contact a licensed professional to assess structural integrity and begin water damage repair steps.
How can you tell if water is leaking behind the wall?
Look for soft or spongy drywall, musty odors, discoloration patterns, or bubbling paint along walls. Use a moisture meter to detect elevated moisture levels in wall cavities, readings above 20% indicate saturation. Thermal imaging cameras reveal temperature differences caused by moisture intrusion. Listen for dripping sounds inside walls. If you notice efflorescence (white powdery deposits) on masonry or persistent dampness, water is likely trapped inside. Professional leak detection tools can pinpoint the exact location of hidden moisture.
How long does it take to dry out walls from water damage?
Drying time depends on the extent of saturation and materials involved. Drywall typically requires 7-14 days to dry completely with proper ventilation and dehumidifiers running. Wood framing and cavity spaces may take 2-4 weeks. Masonry and concrete can take 4-8 weeks due to their porous nature. Professional restoration accelerates this timeline using industrial-grade equipment. Mold can begin growing within 24-48 hours, so immediate action is critical. The water damage restoration timeline varies by humidity levels, temperature, and airflow in your home.
When should you call a professional for water damage repair?
Call immediately if water damage affects more than 10 square feet, involves structural elements like wall framing or flooring, or comes from sewage or contaminated sources. If you notice mold growth, persistent musty odors, or soft drywall, professional intervention is necessary. Damage behind walls, in crawl spaces, or affecting multiple rooms requires specialized equipment and expertise. Licensed contractors assess structural integrity, identify hidden moisture intrusion, and ensure proper remediation to prevent long-term damage and mold growth.
Frequently asked questions
What are the immediate steps to take after a pipe bursts?
First, shut off your main water supply immediately to stop the flow. Turn off electricity to affected areas if water is near outlets or appliances. Remove standing water using a wet vacuum or mop, and open windows and doors for ventilation. Move furniture and personal items away from the damaged area. Document the damage with photos for insurance purposes. Then contact a licensed professional to assess structural integrity and begin water damage repair steps.
How can you tell if water is leaking behind the wall?
Look for soft or spongy drywall, musty odors, discoloration patterns, or bubbling paint along walls. Use a moisture meter to detect elevated moisture levels in wall cavities—readings above 20% indicate saturation. Thermal imaging cameras reveal temperature differences caused by moisture intrusion. Listen for dripping sounds inside walls. If you notice efflorescence (white powdery deposits) on masonry or persistent dampness, water is likely trapped inside. Professional leak detection tools can pinpoint the exact location of hidden moisture.
How long does it take to dry out walls from water damage?
Drying time depends on the extent of saturation and materials involved. Drywall typically requires 7–14 days to dry completely with proper ventilation and dehumidifiers running. Wood framing and cavity spaces may take 2–4 weeks. Masonry and concrete can take 4–8 weeks due to their porous nature. Professional restoration accelerates this timeline using industrial-grade equipment. Mold can begin growing within 24–48 hours, so immediate action is critical. The water damage restoration timeline varies by humidity levels, temperature, and airflow in your home.
When should you call a professional for water damage repair?
Call immediately if water damage affects more than 10 square feet, involves structural elements like wall framing or flooring, or comes from sewage or contaminated sources. If you notice mold growth, persistent musty odors, or soft drywall, professional intervention is necessary. Damage behind walls, in crawl spaces, or affecting multiple rooms requires specialized equipment and expertise. Licensed contractors assess structural integrity, identify hidden moisture intrusion, and ensure proper remediation to prevent long-term damage and mold growth.