Can You Paint Over Semi-Gloss Without Sanding?
how-to · October 29, 2026 · Editorial Team
Last Updated: October 29, 2026
Quick Summary
Yes, you can paint over semi-gloss without sanding when the surface is clean, dulled, and primed for grip. Cleaning, deglossing, and a bonding primer can replace sanding on sound latex paint, but oil-based semi-gloss under latex needs scuff sanding and a bonding primer.
- Semi-gloss dries to a slick, closed surface that gives new paint almost nothing to grip.
- Rub a cotton ball soaked in rubbing alcohol on a hidden spot to tell latex from oil-based paint.
- Liquid deglosser dulls the shine without sanding, but it will not fix peeling or flaking paint.
- Stir bonding primer instead of shaking it so trapped air bubbles do not become pinholes.
- Most bonding primers have a recoat window of roughly one to four hours.
Table of Contents
- Can You Paint Over Semi-Gloss Without Sanding?
- Why Semi-Gloss Paint Resists New Coats
- How to Tell If the Existing Paint Is Latex or Oil-Based
- When You Can Skip Sanding and When You Cannot
- How to Use Liquid Deglosser as a Sanding Alternative
- The Best Primer for Glossy Surfaces and How to Apply It
- How Long to Let Primer Dry Before Painting
- Troubleshooting Peeling, Scratching, and Poor Adhesion
- Getting a Finish That Lasts
- Frequently Asked Questions
Can You Paint Over Semi-Gloss Without Sanding?
Yes, you can paint over semi-gloss without sanding, but only when the surface is clean, dulled, and primed for grip.
Homeowners often paint over shiny trim and find it flaking a year later.
Semi-gloss is a paint finish with a smooth, light-reflecting surface.
The U.S. Environmental Protection Agency's lead paint renovation guidelines matter here too, especially in older homes. More on that below.
Here is the short answer: sanding is one option, not the only one.
Why Semi-Gloss Paint Resists New Coats
Semi-gloss paint dries to a slick, closed surface. That slickness is the whole problem.
Sheen is the measure of how much light a paint finish reflects. Higher sheen means a smoother, harder film.
That hardness helps on trim, doors, and bathroom walls. It resists scrubbing and moisture.
A common mistake is painting right over the shine. The new coat looks fine for weeks, then scratches off with a fingernail.
How to Tell If the Existing Paint Is Latex or Oil-Based
Before you decide on prep, figure out what is already on the wall. Latex paint and oil-based paint behave differently under a new coat, and the test result should change your plan, not just satisfy curiosity.
The rubbing-alcohol test
Rub a cotton ball soaked in rubbing alcohol on a hidden spot, such as the back of a closet shelf or a corner behind a door. If paint color comes off on the cotton, it is latex (water-based).
A second confirmation test: apply a small patch of paint remover or a dedicated paint-testing solvent. Oil-based paint softens slowly and stays gummy. Latex lifts and wrinkles faster.
What the result means for your prep
This is where most guides stop, and it is the part that actually decides whether your new coat holds.
- Latex over latex: the most forgiving combination. Clean, degloss or scuff lightly, and a standard acrylic primer is usually enough. You can often skip sanding entirely on low-traffic walls.
- Oil-based under latex: the highest-risk combination. Latex does not chemically bond to a hard, slick alkyd film, so you need to scuff sand to dull the sheen and then apply a bonding primer labeled for glossy or hard-to-bond surfaces. Skipping either step is the most common cause of peeling we get called about.
- Latex under oil-based: possible but uncommon for interior repaints, and it usually requires a primer formulated for the transition. Check the topcoat label before assuming it will bond.
Check the paint condition at the same time
Compatibility is only half the decision. While you are testing, press a fingernail into the paint and look for chalky residue on your finger. Chalky, flaking, or peeling areas need more than a wipe-down.
If the paint is tight, clean, and dulls after a light scuff, you have a sound substrate. If it lifts at the edges or powders when rubbed, fix that first.
Once you know the coating type and its condition, the decision guide below tells you whether sanding can be skipped.
When You Can Skip Sanding and When You Cannot
Skipping sanding is safe in some cases and risky in others. Use this decision guide before you pick up a brush.
You can usually skip sanding when:
- The existing coat is tight, clean, and not peeling
- The surface is latex over latex
- You plan to use a liquid deglosser or bonding primer
- The area is low-traffic, like a ceiling or upper wall
You should sand or scuff when:
- The paint is oil-based and you are topcoating with latex
- The surface is high-touch, like doors, cabinets, or handrails
- Old paint is glossy and shows no dulling after cleaning
- There are bumps, drips, or rough patches to level
Scuff sanding is the middle ground. You do not strip the paint. You just dull the shine with light passes of fine paper. It takes minutes and adds real grip.
The table below sums up the call.
| Situation | Skip Sanding? | Best Prep |
|---|---|---|
| Latex over latex, clean and tight | Yes | Clean and degloss |
| Oil-based under latex | No | Scuff sand plus bonding primer |
| High-touch doors and cabinets | No | Scuff sand and prime |
| Peeling or chalky paint | No | Remove loose paint first |
How to Use Liquid Deglosser as a Sanding Alternative
Liquid deglosser is a chemical cleaner that dulls a glossy surface without sanding. It strips the shine and leaves a grippier surface for paint.
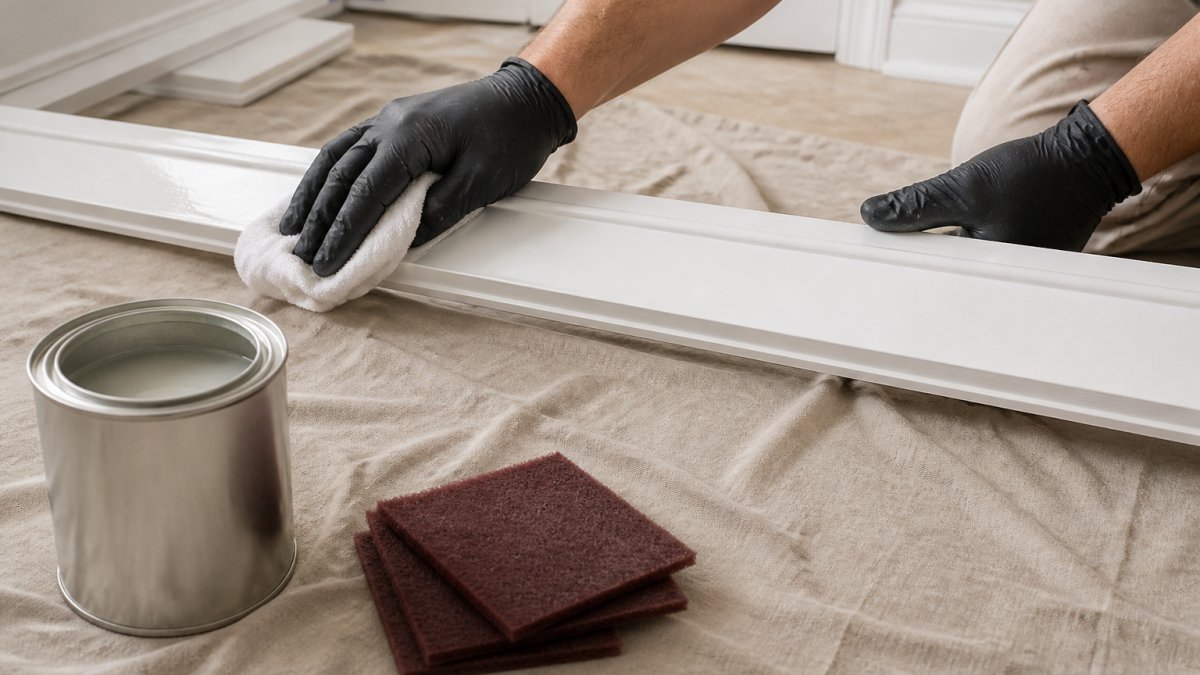 Homeowner applying liquid deglosser to trim for a semi-gloss without sanding finish on a drop cloth.
Here is how it is typically used.
- Clean the surface first with a degreasing cleaner. Let it dry fully.
- Put on gloves and open windows for airflow.
- Soak a rag with deglosser. Wipe in one direction, section by section.
- Keep the surface wet for a few minutes, then wipe off the residue.
- Let it dry, then check the sheen. It should look dull, not shiny.
A common mistake is skipping the first cleaning step. Deglosser over dust and grease just pushes grime around.
Deglosser is not a substitute for removing loose paint. It only changes the surface texture. It will not fix peeling or flaking.
The Best Primer for Glossy Surfaces and How to Apply It
A bonding primer is a common choice for glossy surfaces, but "bonding primer" is a category, not a single product. The right pick depends on the surface, the existing coating, and how the area will be used. This is the part most guides skip.
Match the primer to the surface
- Interior walls and ceilings (latex over latex): a standard acrylic bonding primer is enough. Look for a label that names glossy or hard-to-bond surfaces.
- Trim, doors, and cabinets: a high-adhesion bonding primer or a shellac-based primer. Shellac-based products grip hard, slick films and block tannin bleed from wood, which matters on older stained trim.
- Bathrooms and kitchens: a primer rated for high humidity, paired with a topcoat rated for the same. Moisture is the failure mode here, not just sheen.
- Metal, tile, or laminate: a primer specifically labeled for those substrates. A wall primer will not grip a factory finish.
Check the label for two things: the words "bonding" or "hard-to-adhere," and a recoat window. If the can does not state a recoat time, pick a different product.
Application steps that actually matter
- Stir the primer well. Do not shake it. Shaking traps air bubbles that show up as pinholes in the topcoat.
- Apply with a brush or small roller in thin, even coats. Work in one direction, then cross back over to cover lap marks.
- Keep the coat thin. A heavy coat traps solvent and dries unevenly, which weakens the bond you are trying to build.
- Let it dry to the touch before recoating. Two thin coats grip better than one thick one.
Common primer mistakes
- Priming over dirt or grease. Primer bonds to the surface, not through grime. Clean first, always.
- Using primer as a substitute for deglossing. Primer promotes adhesion; it does not change the sheen of the coat underneath. On a slick semi-gloss film, degloss or scuff first, then prime.
- Skipping the recoat window. Most bonding primers have a window of roughly one to four hours for recoating. Past that, some products need a light scuff before the topcoat will bond.
The American Coatings Association's guidance on surface preparation backs this up: prep and primer choice drive how well a coating holds.
How Long to Let Primer Dry Before Painting
Primer needs to dry to the touch before you topcoat, but full cure takes longer.
Do not rush it. Painting over tacky primer traps solvent and causes poor adhesion.
A simple test: press a finger on a hidden spot. If it feels sticky, wait.
Humidity and temperature change the timing. Cool, damp rooms slow drying.
Between coats of paint, follow the same rule.
Troubleshooting Peeling, Scratching, and Poor Adhesion
Peeling and scratching after a repaint almost always trace back to prep.
Common causes and fixes:
- Peeling in sheets: the surface was dirty or glossy. Strip the loose coat, clean, degloss, and prime.
- Scratches easily: the paint went on too thin or over a slick surface. Add a bonding primer and a second topcoat.
- Flaking at edges: loose paint was painted over. Remove the loose material first.
- Bubbling: moisture or solvent trapped under the coat. Let each layer dry fully.
Texture matters too. A surface with roughness holds paint better than a glass-smooth one.
When peeling has already damaged drywall or trim, patching is a job in itself.
Dust control matters as well. Wipe surfaces before painting so dust does not sit between coats and weaken the bond.
Getting a Finish That Lasts
The honest answer to whether you can paint over semi-gloss without sanding is: sometimes. Clean, dull, and prime, and the new coat will hold.
A simple rule of thumb: if the surface is slick and the paint is oil-based, scuff sand and use a bonding primer.
When a room needs more than a touch-up, or the prep work is more than you want to take on, professional help is an option.
SmithFamilyPaintingandProjects is a licensed, bonded, and insured Class A contractor.
Frequently Asked Questions
What happens if you paint over semi-gloss without primer?
The new coat can fail to bond because the slick surface gives it nothing to grip. Paint may bead up, dry with a rough texture, or peel in sheets once it cures. On trim and doors that get touched often, that failure shows up fast. A bonding primer made for glossy surfaces solves this by creating a grippy layer the topcoat can lock onto, even when you skip sanding entirely.
Is liquid deglosser a good alternative to sanding?
For most interior walls and trim in good condition, yes. Liquid deglosser is a chemical liquid you wipe on with a rag to dull the sheen and leave a slightly tacky surface for the new coat. It reaches curves, spindles, and detailed trim that sandpaper struggles with. It does not fix flaking paint, chipped edges, or uneven texture, so those still need scraping and sanding first.
Do you have to sand gloss before painting?
Not always. If the existing coating is sound, clean, and deglossed, a quality bonding primer can carry the adhesion load. Sanding is still the safer route for high-traffic trim, doors, and cabinets, and it is required when the old paint is peeling or the surface is uneven. A quick scuff sand with 220-grit takes minutes and gives you a wider margin for error.
How do you know if your paint is oil-based or latex?
Rub a cotton ball soaked in rubbing alcohol on a hidden spot. Latex paint softens and lifts onto the cotton; oil-based paint stays put. You can also check the sheen and feel: oil-based paint cures harder and yellows over time, while latex stays slightly more flexible. Knowing which one you have matters because oil-based coatings need more aggressive preparation before a latex topcoat goes on.
How long should primer dry before you paint over it?
Recoat timing varies by product, so check the can for the manufacturer's recoat window. Humidity and temperature slow curing, so give it more time in a steamy bathroom or a cool garage. If the primer still feels tacky or smells wet, wait longer before applying paint.

Frequently asked questions
What happens if you paint over semi-gloss without primer?
The new coat can fail to bond because the slick surface gives it nothing to grip. Paint may bead up, dry with a rough texture, or peel in sheets once it cures. On trim and doors that get touched often, that failure shows up fast. A bonding primer made for glossy surfaces solves this by creating a grippy layer the topcoat can lock onto, even when you skip sanding entirely.
Is liquid deglosser a good alternative to sanding?
For most interior walls and trim in good condition, yes. Liquid deglosser is a chemical liquid you wipe on with a rag to dull the sheen and leave a slightly tacky surface for the new coat. It reaches curves, spindles, and detailed trim that sandpaper struggles with. It does not fix flaking paint, chipped edges, or uneven texture, so those still need scraping and sanding first.
Do you have to sand gloss before painting?
Not always. If the existing coating is sound, clean, and deglossed, a quality bonding primer can carry the adhesion load. Sanding is still the safer route for high-traffic trim, doors, and cabinets, and it is required when the old paint is peeling or the surface is uneven. A quick scuff sand with 220-grit takes minutes and gives you a wider margin for error.
How do you know if your paint is oil-based or latex?
Rub a cotton ball soaked in rubbing alcohol on a hidden spot. Latex paint softens and lifts onto the cotton; oil-based paint stays put. You can also check the sheen and feel: oil-based paint cures harder and yellows over time, while latex stays slightly more flexible. Knowing which one you have matters because oil-based coatings need more aggressive preparation before a latex topcoat goes on.
How long should primer dry before you paint over it?
Recoat timing varies by product, so check the can for the manufacturer's recoat window. Humidity and temperature slow curing, so give it more time in a steamy bathroom or a cool garage. If the primer still feels tacky or smells wet, wait longer before applying paint.