Best Ways to Update Kitchen Cabinets in 2026
ultimate-guide · September 8, 2026 · Editorial Team
Table of Contents
- Why Updating Beats Replacing Your Kitchen Cabinets
- How to Paint Kitchen Cabinets Professionally (Step-by-Step)
- How Long Does It Take to Paint Kitchen Cabinets?
- Cabinet Refacing: A Cost-Effective Alternative
- Hardware and Hinges: The Quickest Update
- Structural Updates: Crown Molding, Open Shelving, and Organizers
- DIY vs. Hiring a Professional: What to Consider
- Conclusion: Your Best Path to Updated Cabinets
- Frequently Asked Questions
Last Updated: September 8, 2026
Kitchens sell homes, but full cabinet replacement is one of the most expensive renovations you can undertake. The best ways to update kitchen cabinets in 2026 focus on refreshing what you already own, saving thousands while delivering a transformation that feels brand new.
Updating kitchen cabinets is the smart financial middle ground between living with dated cabinetry and tearing everything out, keeping costs down and avoiding the disruption of full demolition.
Why Updating Beats Replacing Your Kitchen Cabinets
If your existing boxes are structurally sound, with dovetail joints and no water damage, they will outlast new budget-grade replacements. You are essentially getting better bones than a mid-range replacement would provide, then giving them a fresh face.
The National Association of Realtors Remodeling Impact Report consistently shows that minor kitchen remodels, which include refacing and painting, recover a higher percentage of their cost at resale than major upscale renovations. Replacement also brings hidden costs: new boxes often require adjustments to countertops, backsplashes, and flooring, since dimensions rarely match exactly. Updating your existing cabinets avoids that cascade of follow-on work.
How to Paint Kitchen Cabinets Professionally (Step-by-Step)
Painting is the most popular way to update kitchen cabinets, and for good reason. It delivers a dramatic transformation for a fraction of replacement cost. The difference between a DIY paint job and a professional finish comes down to preparation and equipment.
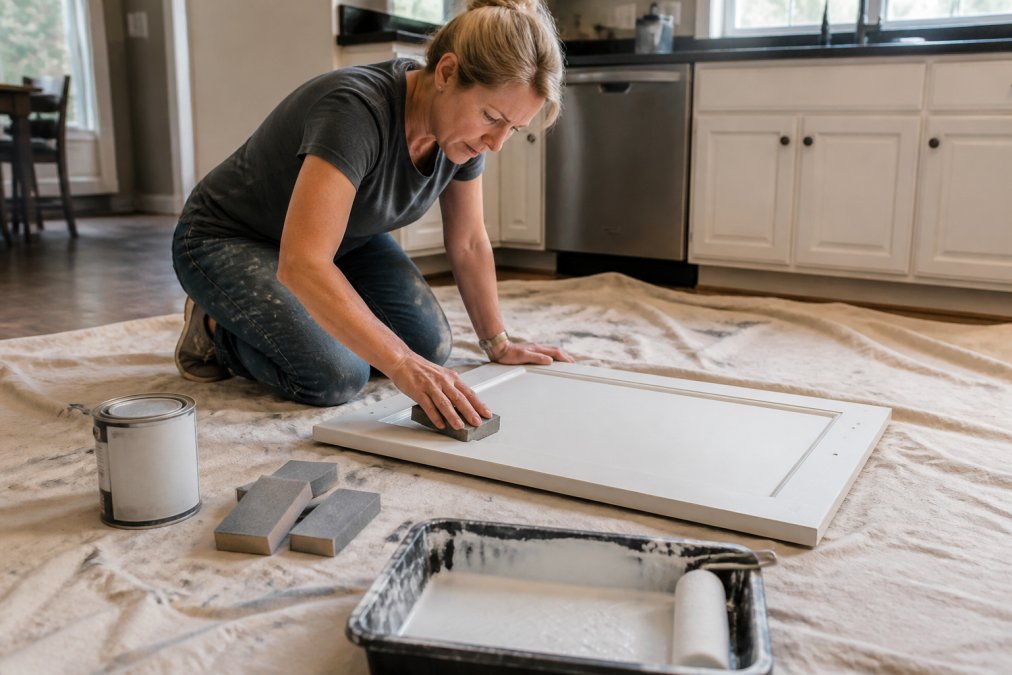 A homeowner in a bright kitchen sanding a cabinet door laid flat on a drop cloth, with a paint tray, primer can, and sanding blocks arranged nearby
A professional-grade result requires spraying rather than brushing. An HVLP sprayer lays down a smooth, even coat that mimics a factory finish.
Prep Work: Cleaning, Sanding, and Priming
Preparation determines whether your paint job lasts two years or fifteen. Degreasing with a strong cleaner like TSP substitute is the first non-negotiable step. After cleaning, sand with 120-grit sandpaper, wipe away dust with a tack cloth, and fill any dings or old hardware holes with wood filler. A high-quality primer designed for cabinetry seals the surface and blocks stains from bleeding through.
Choosing the Right Paint and Finish
You need a product formulated for high-traffic, washable surfaces. Alkyd or acrylic-alkyd hybrid paints cure to a hard, durable film; standard wall paint stays soft and will chip easily. Semi-gloss and satin finishes resist moisture and wipe clean easily. Flat or matte finishes trap grease and show every fingerprint.
Tool Breakdown: HVLP Sprayers vs. Rollers vs. Brushes
HVLP (High-Volume Low-Pressure) Sprayers are the gold standard for cabinet finishing. A turbine unit like the Fuji 2903-T75 or Graco Magnum 257025 atomizes paint into a fine mist, leaving a smooth, factory-like finish. Spraying is faster but requires more setup: you must mask off the surrounding kitchen, create a clean spraying area, and thin the paint to the specified viscosity. Practice on scrap wood before spraying your actual cabinets.
High-Density Foam Rollers are the best DIY alternative when spraying is not feasible. A 6-inch foam roller with a 3/8-inch nap applies paint in a thin, even layer. Roll in one direction and maintain a wet edge to avoid lap marks. Do not use a standard napped roller, as it leaves a stippled texture that collects grease.
Brushes are reserved for edges, corners, and detailed areas. A high-quality angled sash brush with synthetic bristles (such as a Purdy or Wooster) is essential for cutting in around the frame and painting recessed panels of shaker doors.
Spray vs. Roll Durability: A properly sprayed finish is more durable because the paint forms a continuous film without the microscopic peaks and valleys a roller creates. If you roll, applying an extra coat of a water-based polyurethane topcoat can extend the finish's life significantly.
Step-by-Step Process for a Factory-Quality Finish
- Remove all doors, drawers, and hardware. Label each door and its hinge location with painter's tape. Store screws in labeled bags.
- Degrease every surface. Use a TSP substitute (like Krud Kutter or Dirtex) mixed with warm water. Grease is invisible but will cause paint to fisheye or peel within months.
- Sand to scuff the existing finish. Use 120-grit sandpaper to create a dull, rough surface that primer can bond to. For glossy finishes, some professionals use a liquid deglosser, but sanding is more reliable.
- Fill imperfections. Use a two-part wood filler to patch old hardware holes, dings, and scratches. Sand smooth with 150-grit paper.
- Vacuum and tack-cloth everything. Dust is the enemy of a smooth finish.
- Prime with a bonding primer. A shellac-based primer (like Zinsser B-I-N) or a high-adhesion acrylic primer (like Stix) is essential. Shellac-based primers block tannin bleed from oak and stain bleed from knots.
- Sand the primer. Lightly sand with 220-grit sandpaper to knock down raised grain or dust nibs.
- Spray or roll the first coat of paint. If spraying, use a 1.5-2.0 mm tip for latex paints. If rolling, use a foam roller in long, even strokes. Let dry per manufacturer instructions.
- Lightly sand between coats. Use 320-grit sandpaper to smooth imperfections. This is the secret to a glass-smooth finish.
- Apply the second coat. Two coats are the minimum; three are better for high-traffic kitchens.
- Apply a clear topcoat (optional but recommended). A water-based polyurethane (like General Finishes High Performance Topcoat) adds a sacrificial layer that protects the paint from scratches and chemical wear.
- Let the paint cure fully before rehanging. Paint dries to the touch in hours but takes 7-14 days to fully cure. Rehanging doors early will cause denting and scratching at hinge points.
Common Mistakes That Ruin a Cabinet Paint Job
- Skipping the degreasing step. This is the #1 cause of peeling paint.
- Using wall paint instead of cabinet paint. Wall paint is too soft and will chip within months.
- Not sanding between coats. This leaves a rough, gritty texture.
- Rushing the cure time. Paint needs 7-14 days to fully harden.
- Painting over hardware. This looks sloppy and makes future removal difficult.
- Using a standard roller. The stippled texture traps grease and looks unprofessional.
Maintenance: How to Keep Your Painted Cabinets Looking New
A professional-grade paint job will last 10-15 years with proper care. Clean with mild dish soap and water, avoiding harsh degreasers or abrasive scrubbers. Wipe up spills immediately, use a soft microfiber cloth, tighten hinges and hardware regularly, and touch up chips immediately with a small artist's brush.
How Long Does It Take to Paint Kitchen Cabinets?
Painting kitchen cabinets is not a weekend project. A realistic timeline for a DIY homeowner painting a standard 10-door kitchen is five to seven days of work spread across a week and a half. Professionals complete the job faster with commercial drying equipment, but even they need several days on site. The single biggest mistake is rushing the cure time.
Cabinet Refacing: A Cost-Effective Alternative
Cabinet refacing sits between painting and full replacement in both cost and result. The process replaces your cabinet doors and drawer fronts while keeping the existing cabinet boxes. New veneer covers the visible box frames. This approach is the best option for homeowners who want a completely different door style, not just a new color.
Kitchen cabinet refacing cost depends heavily on door material, cabinet count, and labor rates. Refacing is a strong choice when your existing doors are warped, dated, or simply the wrong style, since painting cannot fix a door profile you dislike.
Understanding Kitchen Cabinet Refacing Cost
Refacing typically costs significantly less than replacement because you reuse the existing boxes and avoid countertop and flooring adjustments (thisoldhouse.com). Refacing requires professional installation, since custom-fit doors and veneer application demand precision.
Hardware and Hinges: The Quickest Update
If painting feels overwhelming, hardware is the entry point. Swapping out cabinet hardware delivers an immediate visual refresh with minimal skill required. Old brass knobs and hinges date a kitchen faster than almost any other single element. This update is genuinely a weekend project: remove old knobs and pulls, fill the existing screw holes if the new hardware has different spacing, and install the new pieces.
The Real Cost of a Hardware Refresh
Cabinet hardware is one of the least expensive updates you can make. For a standard kitchen with 10 cabinet doors and 5 drawers:
- Knobs: $2 to $8 each. A budget-friendly set of 20 knobs runs $40 to $160.
- Drawer pulls: $4 to $15 each depending on length and material. A set of 5 pulls runs $20 to $75.
- Soft-close hinges: $3 to $10 per hinge. A kitchen with 20 hinges runs $60 to $200. This is the single highest-impact upgrade you can make for the money.
- Total project cost: $100 to $400 for a full refresh.
Compare that to painting ($300 to $1,500 for DIY supplies or $1,500 to $5,000 for professional) or refacing ($4,000 to $10,000). Hardware is the highest ROI update available.
Choosing the Best Cabinet Hardware for Modern Kitchens
The best cabinet hardware for modern kitchens balances style with function. Drawer pulls should accommodate four fingers comfortably. Knobs work well on cabinet doors but are awkward on wide drawers. Finish selection matters more than style. The most popular finishes in 2026 are:
- Matte black: The dominant finish for modern and transitional kitchens. It hides fingerprints well and pairs with almost any color scheme.
- Brushed nickel: The safest choice for traditional kitchens. It resists corrosion and blends with most existing fixtures.
- Oil-rubbed bronze: A warmer alternative to black, suited for farmhouse and rustic styles. It develops a patina over time.
- Brass (unlacquered): A trending choice for 2026. Unlacquered brass darkens and patinas with handling, creating a lived-in look. If you want it to stay bright, choose a lacquered version.
- Chrome (polished): A high-shine option that reads as modern but shows fingerprints and water spots easily.
Mixing metals is a current design trend, but it requires intention. If you choose mixed finishes, repeat each metal at least twice in the room so the combination looks deliberate.
Installation Mechanics: What Most Guides Skip
Screw hole spacing is the #1 compatibility issue. Most cabinet knobs use a single screw, so they are universally compatible. Pulls come in standard center-to-center spacing measurements: 3 inches (76mm), 4 inches (96mm), 5-1/16 inches (128mm), and 6-1/2 inches (160mm) are the most common. Measure the distance between the centers of your existing pull screws before ordering new ones.
Filling old screw holes: Use a two-part wood filler or a wax-based filler stick. For a permanent fix, cut a wooden dowel to size, coat it with wood glue, tap it into the hole, and sand it flush.
Drilling new holes: Use a drill with a 5/32-inch bit for standard #8 screws. Mark the hole location with a pencil and a level to ensure alignment. A drilling template costs $10 to $20 and prevents misaligned holes.
Soft-close hinge installation: Replacing standard hinges with soft-close versions is more involved than swapping knobs. Most modern soft-close hinges are "clip-on" style. If your cabinet boxes are frameless (European style), you will need to adjust the hinge's depth and side-to-side position using the integrated cam screws. Allow 30-45 minutes per door for the first few, then about 15 minutes per door once you get the hang of it.
Maintenance and Longevity of Hardware Finishes
Cabinet hardware takes daily abuse. Matte black and oil-rubbed bronze resist scratches but can wear at contact points over 5-10 years. Brushed nickel and chrome resist corrosion but can show water spots. Unlacquered brass intentionally patinas over time. Cheap hardware (under $2 per piece) often has a thin lacquer that will chip or peel within 1-2 years; paying $4 to $8 per piece for a quality brand (like Emtek, Amerock, or Liberty) is worth it.
Hinge maintenance: Soft-close hinges have internal springs and dampers that can wear out after 10-15 years (build.com). If a hinge stops soft-closing, it is usually cheaper to replace it than to repair it.
A Unique Angle: Hardware as a Style Reset
Beyond the functional swap, hardware is the fastest way to shift your kitchen's design era. A kitchen with dated oak cabinets and brass knobs reads as "1990s." Swap the brass for matte black and the same oak cabinets read as "modern farmhouse." Large, substantial pulls make cabinets feel more custom and expensive. Hardware is the jewelry of the kitchen, and it is the cheapest way to change the entire style direction of the room.
When Hardware Alone Is Not Enough
If your hardware is already modern but your kitchen still feels dated, the problem is likely the cabinet color or door style. In that case, painting or refacing is the better investment. If your cabinet doors are warped, the veneer is peeling, or the boxes are water-damaged, no amount of new hardware will fix the underlying issue.
Structural Updates: Crown Molding, Open Shelving, and Organizers
For cabinets that are functional but visually plain, structural updates add character that paint alone cannot achieve. Crown molding along the top of upper cabinets bridges the gap to the ceiling and gives the kitchen a built-in, custom look.
Removing upper cabinet doors for open shelving works best for displaying matching dishware and daily-use items. Inside the cabinets, sliding shelves and drawer organizers transform storage efficiency. Pull-out shelves make deep corner cabinets usable. These upgrades cost relatively little and improve daily function more than any aesthetic change. A two-toned kitchen cabinet color scheme is another current trend that refacing or painting can achieve.
DIY vs. Hiring a Professional: What to Consider
The honest assessment of DIY cabinet updates starts with your existing skill level and available time. Painting requires patience for prep work and access to spray equipment for a factory-grade finish. Hardware swaps and interior organizers are genuinely beginner-friendly. Refacing and crown molding installation demand professional precision.
A common mistake is underestimating the physical labor. Sanding dozens of doors and drawer fronts is monotonous work that takes days. Mistakes in prep show up as peeling paint within a year.
Hiring a professional removes the risk but requires trusting your contractor. The SmithFamilyPaintingandProjects team approaches every project with honest communication and skilled workmanship. As a licensed, bonded, and insured Class A contractor, we have earned an A+ rating on the BBB and were voted #1 on NextDoor for 2022, 2023, 2024, and 2025.
Conclusion: Your Best Path to Updated Cabinets
The best way to update kitchen cabinets depends on your budget, timeline, and tolerance for DIY risk. Hardware swaps and interior organizers are accessible weekend projects. Painting delivers the strongest transformation per dollar if you execute the prep correctly. Refacing suits homeowners who want a new door style without full replacement.
The common thread across every method is that quality execution determines longevity. A rushed paint job or poorly fitted door will need redoing far sooner than the materials should last.
At SmithFamilyPaintingandProjects, we bring expert attention to detail and personalized service to every kitchen update. Call us at 434-944-4649 to discuss your project and get a straightforward plan for transforming your kitchen.
Frequently Asked Questions
Is it cheaper to paint or replace kitchen cabinets?
Painting your existing cabinets is almost always the cheaper route. The cost difference comes down to materials and labor. Painting involves primer, paint, and sanding supplies, while a full replacement requires new cabinet boxes, doors, and professional installation. If your current cabinet boxes are structurally sound, painting offers significant savings and a fresh look without the expense of a full tear-out.
How do I make old kitchen cabinets look high-end?
Several upgrades can give old cabinets a high-end feel. Replacing dated hardware with modern knobs and pulls makes an immediate difference. Adding crown molding to the top of the cabinets draws the eye upward and creates a built-in look. Installing soft-close hinges and drawer slides adds a premium touch. Finally, a professional paint job with a smooth, durable finish elevates the entire kitchen.
What is the newest trend for kitchen cabinets?
Two-toned kitchen cabinets remain a strong trend, pairing a darker shade on lower cabinets with a lighter color on top. This adds depth and visual interest. Beyond color, the focus is on functionality, with integrated organizers and sliding shelves becoming standard. For finishes, matte and satin options are preferred over high-gloss for a more modern, subdued look.
How do I know if my cabinets are good candidates for refacing?
The key factor is the condition of your cabinet boxes. If the frames are sturdy, free of water damage, and the layout works for you, refacing is a viable option. Refacing involves replacing the doors and drawer fronts and covering the exposed frames with a matching veneer. If the boxes are warped, rotting, or you want to change the layout, full replacement is the better choice.
Frequently asked questions
Is it cheaper to paint or replace kitchen cabinets?
Painting your existing cabinets is almost always the cheaper route. The cost difference comes down to materials and labor. Painting involves primer, paint, and sanding supplies, while a full replacement requires new cabinet boxes, doors, and professional installation. If your current cabinet boxes are structurally sound, painting offers significant savings and a fresh look without the expense of a full tear-out.
How do I make old kitchen cabinets look high-end?
Several upgrades can give old cabinets a high-end feel. Replacing dated hardware with modern knobs and pulls makes an immediate difference. Adding crown molding to the top of the cabinets draws the eye upward and creates a built-in look. Installing soft-close hinges and drawer slides adds a premium touch. Finally, a professional paint job with a smooth, durable finish elevates the entire kitchen.
What is the newest trend for kitchen cabinets?
Two-toned kitchen cabinets remain a strong trend, pairing a darker shade on lower cabinets with a lighter color on top. This adds depth and visual interest. Beyond color, the focus is on functionality, with integrated organizers and sliding shelves becoming standard. For finishes, matte and satin options are preferred over high-gloss for a more modern, subdued look.
How do I know if my cabinets are good candidates for refacing?
The key factor is the condition of your cabinet boxes. If the frames are sturdy, free of water damage, and the layout works for you, refacing is a viable option. Refacing involves replacing the doors and drawer fronts and covering the exposed frames with a matching veneer. If the boxes are warped, rotting, or you want to change the layout, full replacement is the better choice.